Navigating the edit shifts screen
Tags: Payroll, Process, Subcontractors
Navigation
- To begin, navigate to the “Payroll” page by selecting the
Payrolloption in the left side navigation bar. - On the “Payroll Overview” page, you’ll see a list of past payrolls and their relevant information. Select the
Viewbutton on the far right side of the pay period you would like to review and submit.

- Then, in the “View Payroll” page, click the
Edit shiftsbutton on the top right corner of the “Hourly Workers” section.
Edit Shifts screen content
On the “Edit Shifts” page, you will see 2 main components:
- Employee Checklist
- Employee Shifts
Employee checklist
On the left side of the “Edit Shifts” page, you’ll see a high-level view of payroll information for your hourly workers. This includes:
- The pay period
- The total gross pay for all hourly workers
- A list of all “Active workers” (workers who will be paid) and their individual total gross pay
- A list of all “Inactive workers” (workers who will not be paid)
Employee shifts
On the center of the “Edit Shifts” page, you’ll see a section for each “Active” worker that will be paid for the selected payroll.
Each worker’s section includes the following:
- A drop-down with the following information: full name, total hours worked, total gross pay
- A shift hours timetable: a table with all relevant fields for shifts
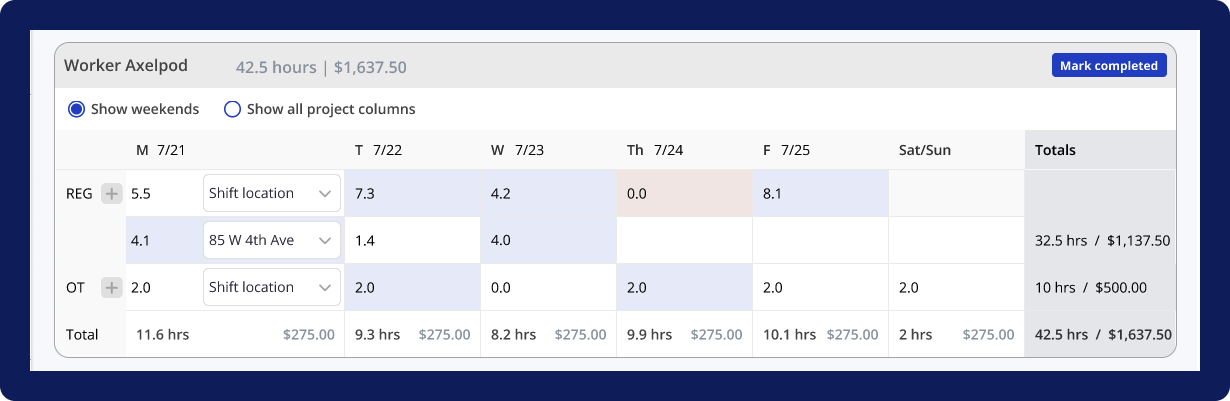
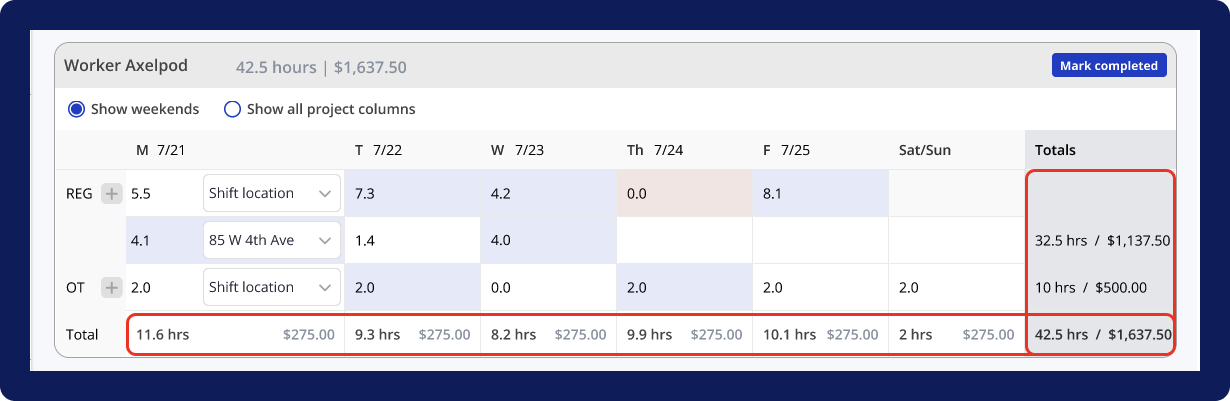
Shift hours timetable
Reviewing and editing shifts for payroll is an important step in the payroll process. As such, it’s important to understand the worker’s shift hours that are available to view in the timetable.
For each worker, you can click on their unique row to expand or collapse the dropdown of their timetable. The timetable will contain all relevant fields needed to review and update their shifts.
Pre-populated fields
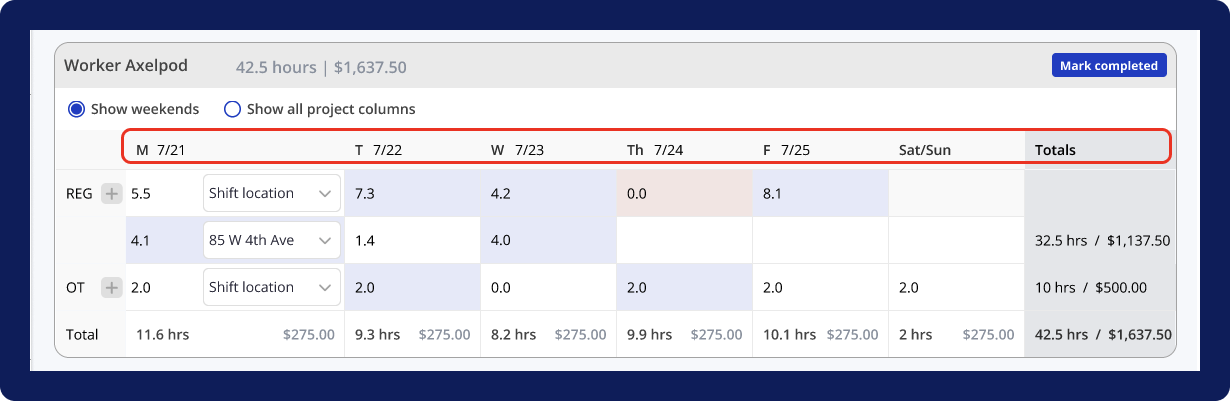
Columns
- Date: for each individual day included in the pay period, you’ll see a day/date column
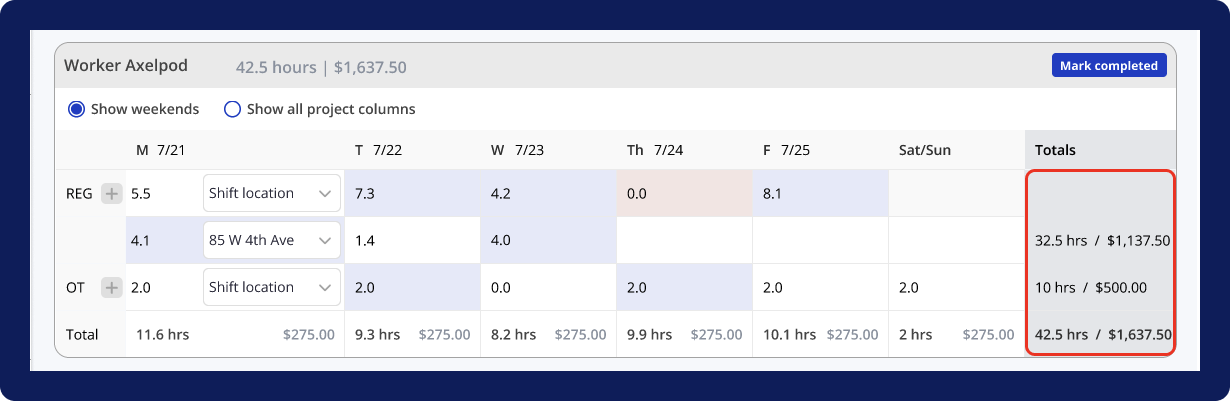
- Totals: for a sum of totals across all days in the pay period, you’ll see the totals broken down by rate type (i.e. totals for regular pay rate, totals for overtime pay rate)
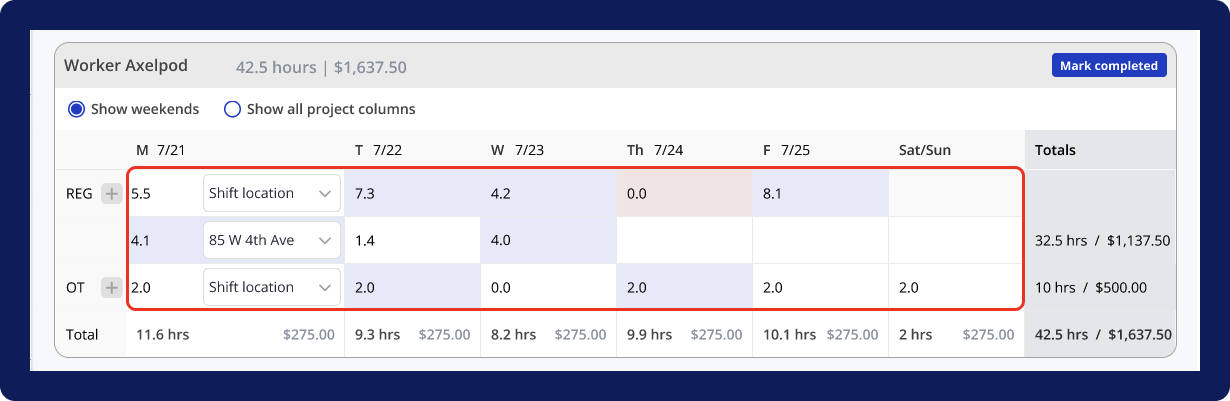
Rows
- REG: the first row below the header is labeled “REG” to indicate shifts that have a regular pay rate. If there are additional shifts with different projects/locations that have a regular rate, then there will be additional rows listed under the 1st “REG” row (and above the 1st “OT” row)
- OT: the row that is labeled “OT” indicates shifts that have an overtime pay rate. If there are additional shifts with different projects/locations that have an overtime rate, then there will be additional rows listed under the 1st “OT” row (and above the “Total” row)
- Totals: to see total amounts across all pay types, look to the “Total” row, which includes data broken down by day/date (i.e. totals for Monday, totals for Tuesday, etc.)
Cells
- For each cell that does not belong to the “Totals” row or column, you’ll see:
- The shift hours for the particular day and associated pay rate
- The shift location/project for the particular day and associated pay rate
- For all cells that belong to the “Totals” row or column, you’ll see:
- The sum of total hours
- The sum of total gross pay
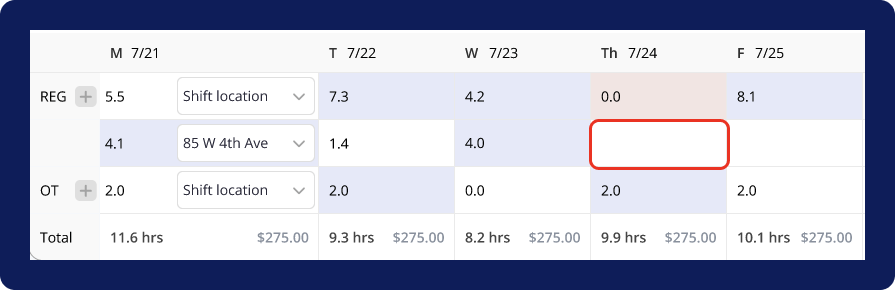
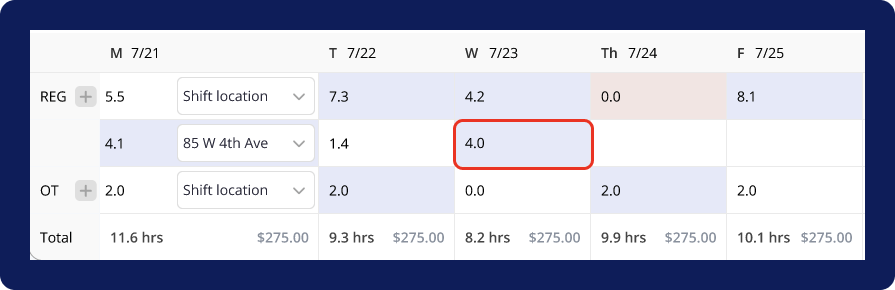
Shift-cell types
In order to update shifts in the worker’s shift hours timetable, it’s important to first understand the different types of shift-cells.
White shift-cell
- If a shift-cell is white AND has a value, then this indicates that the shift has been auto-approved.
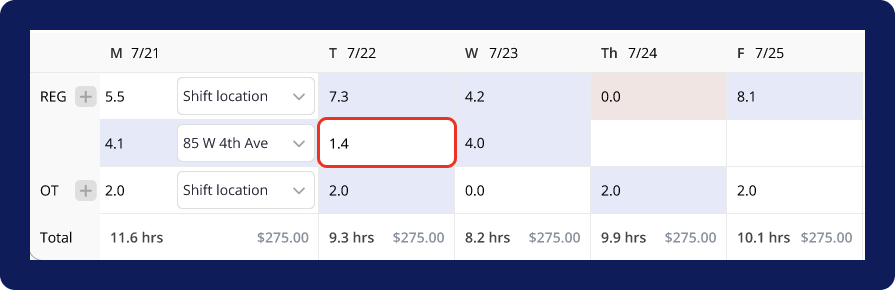
- If a shift-cell is white AND is empty, then this indicates that no shift was recorded.
Blue shift-cell
If a shift-cell is blue, then this indicates that the shift was scheduled but the worker’s timesheet submission does not align. This can be attributed to the following situations:
- The worker clocked-in too early for the shift
- The worker clocked-out too late from the shift
- The worker’s clock-in location does not match the scheduled location
- The worker’s clock-out location does not match the scheduled location
Red shift-cell
If a shift-cell is red, then this indicates that the shift was scheduled but the worker never clocked-in.