How to: create or edit a project
Tags: Prevailing wage, Process, Project, Subcontractors, Task codes
Overview
Creating a project on Trayd is a great tool both for payroll and for time-tracking. Projects make it easier to:
- Create shifts for workers in the “Schedule” screen.
- Keep track of hours and earnings for a particular job site (this is especially helpful for certified payroll and prevailing wage)
- Automatically calculate taxes to stay compliant with state tax laws
- Track current progress against labor budgets
- Breakdown allocation of specific tasks and/or equipment for a particular job site
Process
Create a project
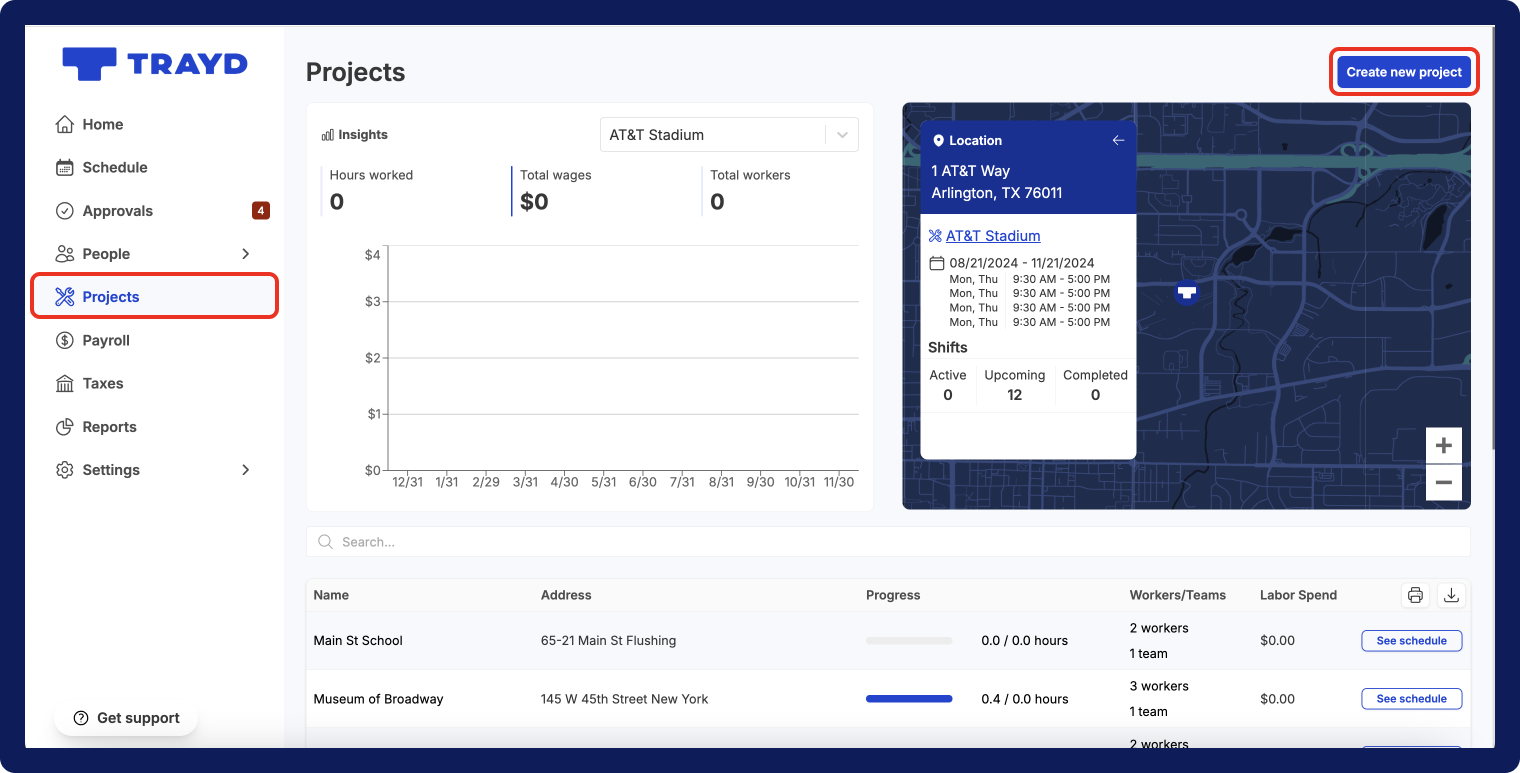
- Select the
Projectsoption listed on the left side navigation bar. Then, select theCreate projectbutton on the top right corner of the screen.
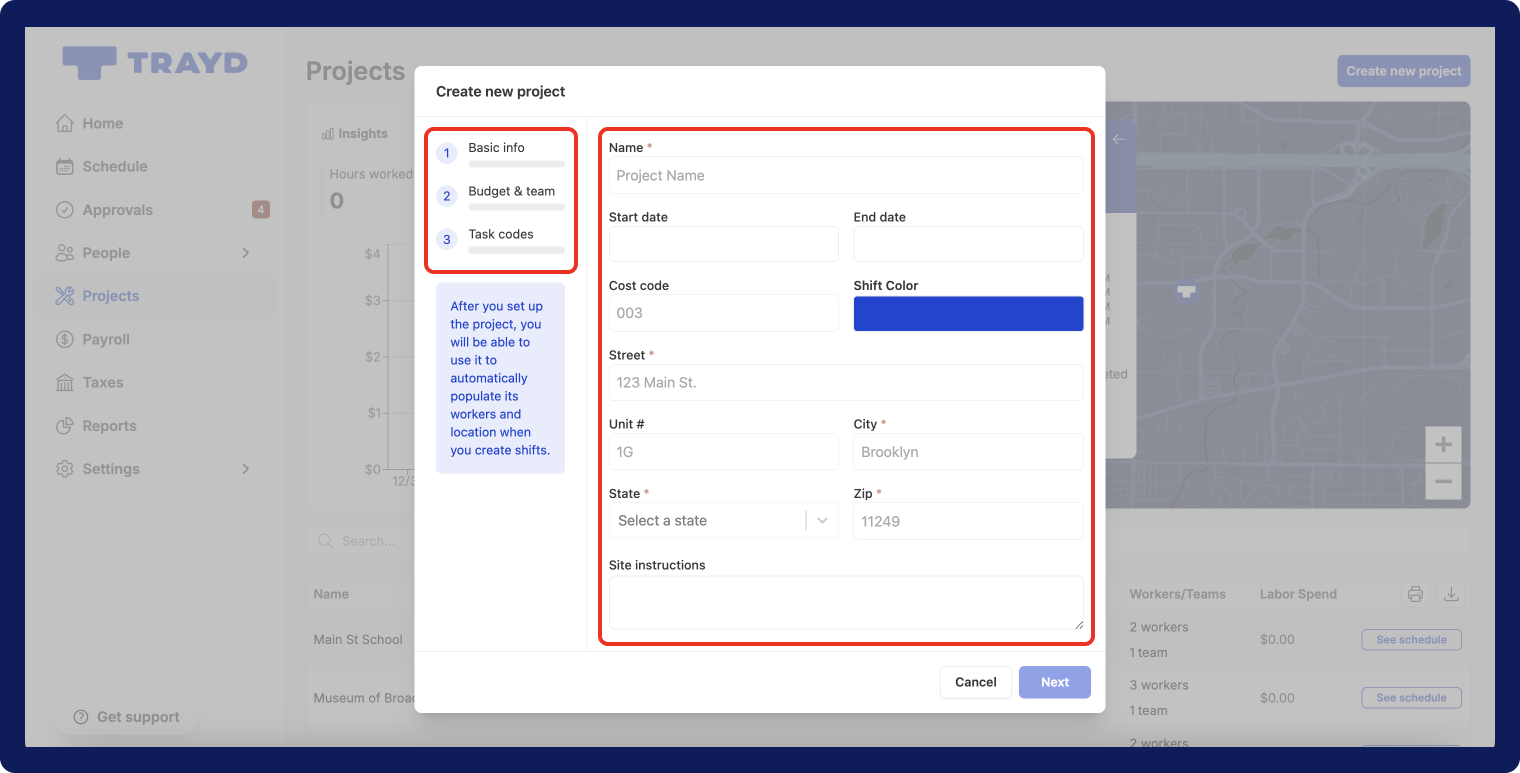
- You’ll see the “Create project” modal pop up. On the left-side, you’ll see the list of steps for adding/editing project details. On the right side, you’ll see all the fields where you can input project details. In the “Basic info” screen, there are 4 required fields that must be filled out for a project: Name, Start date, End date, and Location.
-
Once you��’re done adding the relevant basic info, click
Next.

- In the “Budget & team” screen, you can add add labor budget in order to track the project’s progress. You can also select foremen and the workers you would like to allocate to the project.

- In the “Task codes” Screen, you can click next if you would like to allow foremen and/or workers to see all task codes when entering hours for the project.
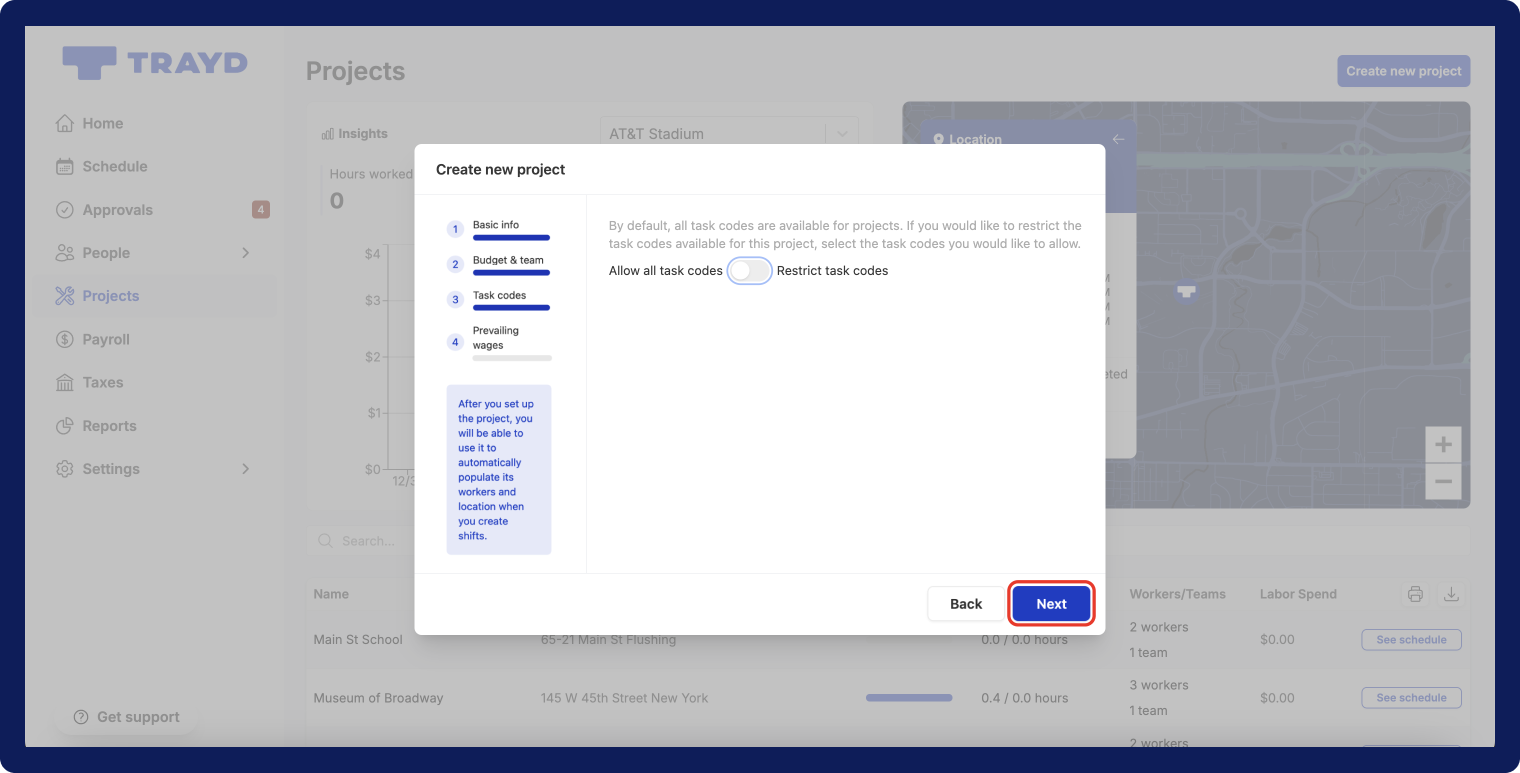
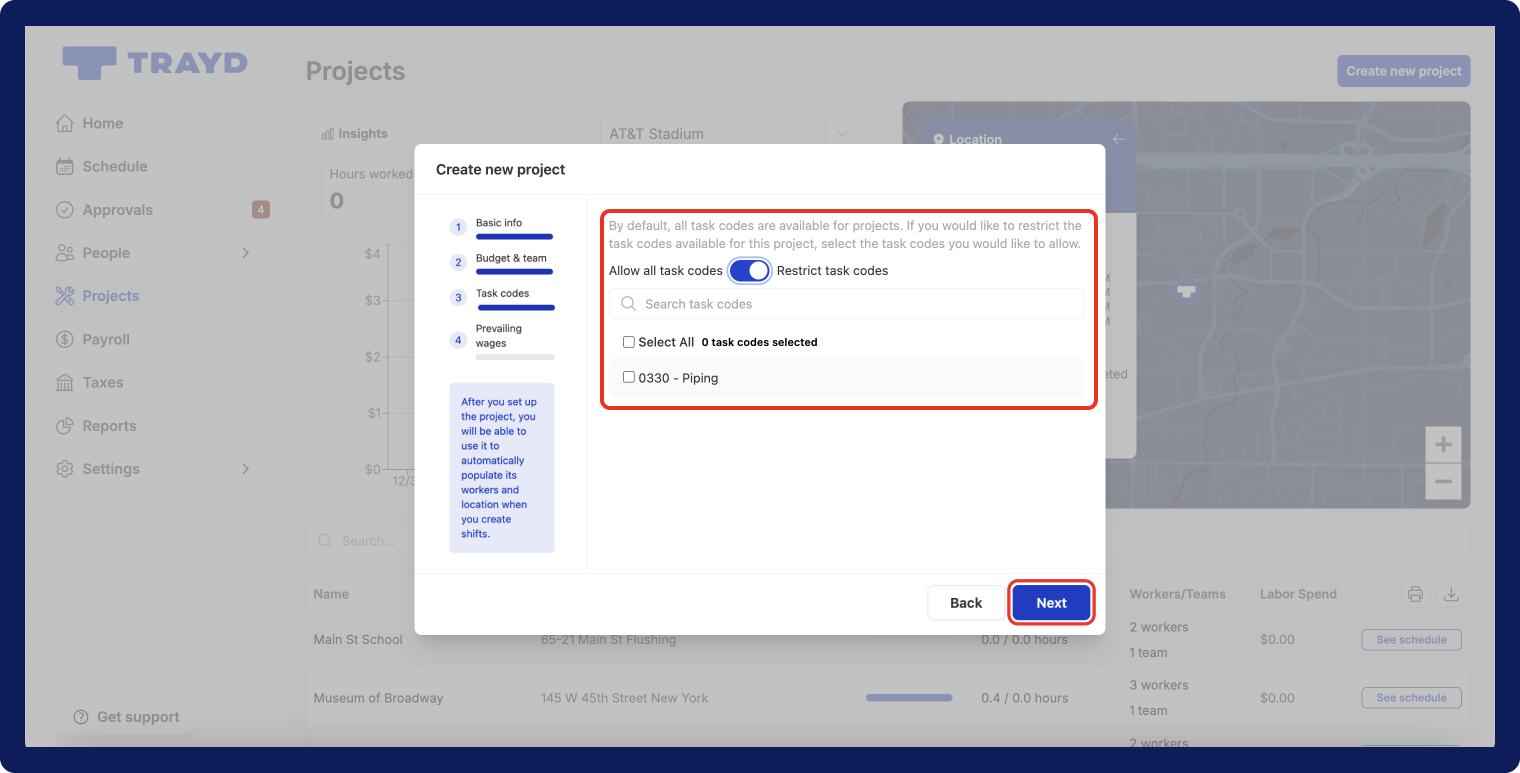
- If you would like to limit the task codes available for a project, toggle to the
Restrict task codesoption. Then, select the task codes you would like to display as options for the project. When you’re done updating, clickNext.
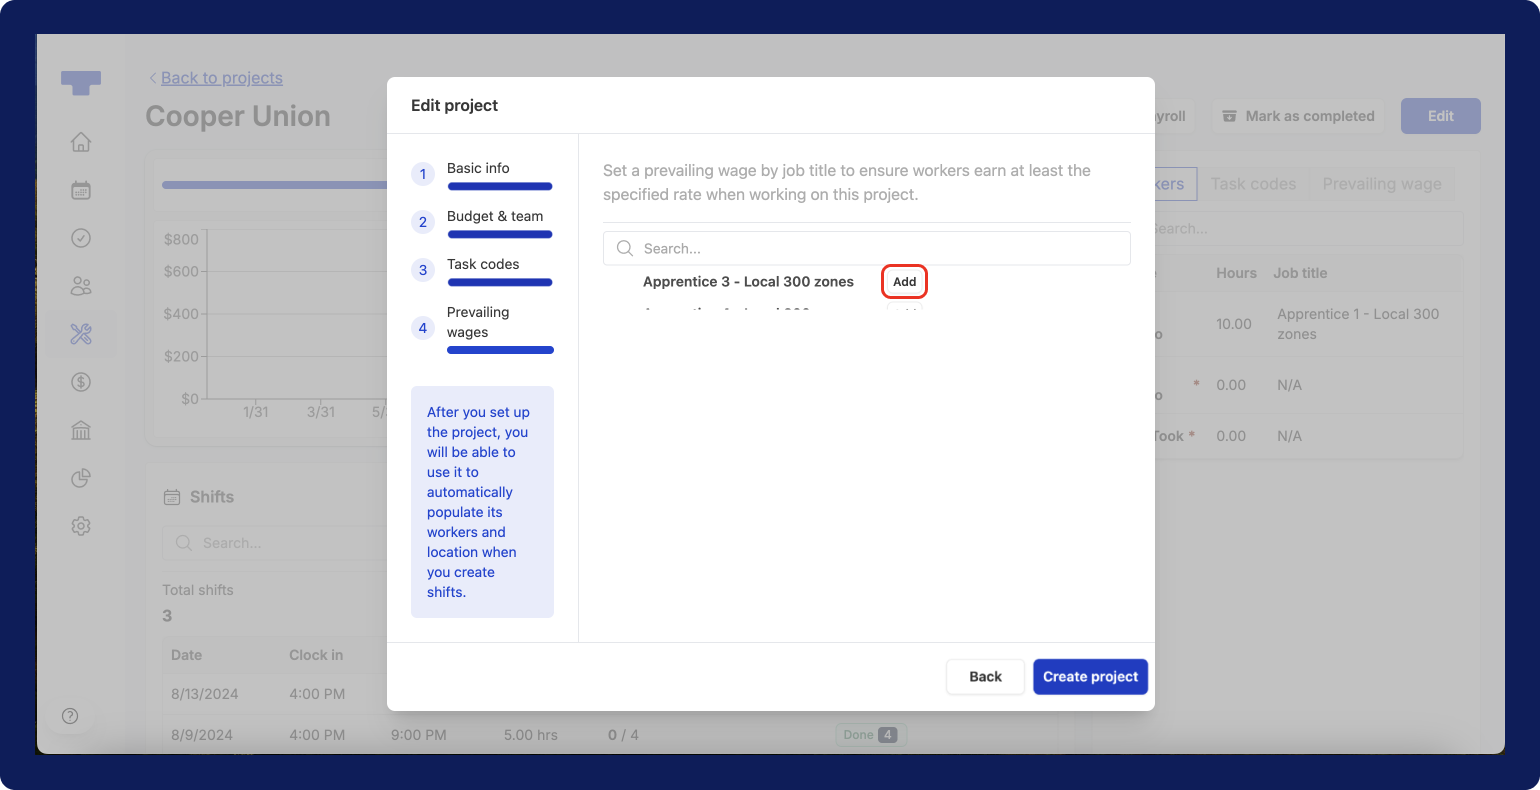
- In the “Prevailing Wages” screen, you can apply prevailing wages to specific job titles. Use the search bar to enter the job title you're looking for. Once you find the desired job title, click the
Addbutton to the right side of the job title.
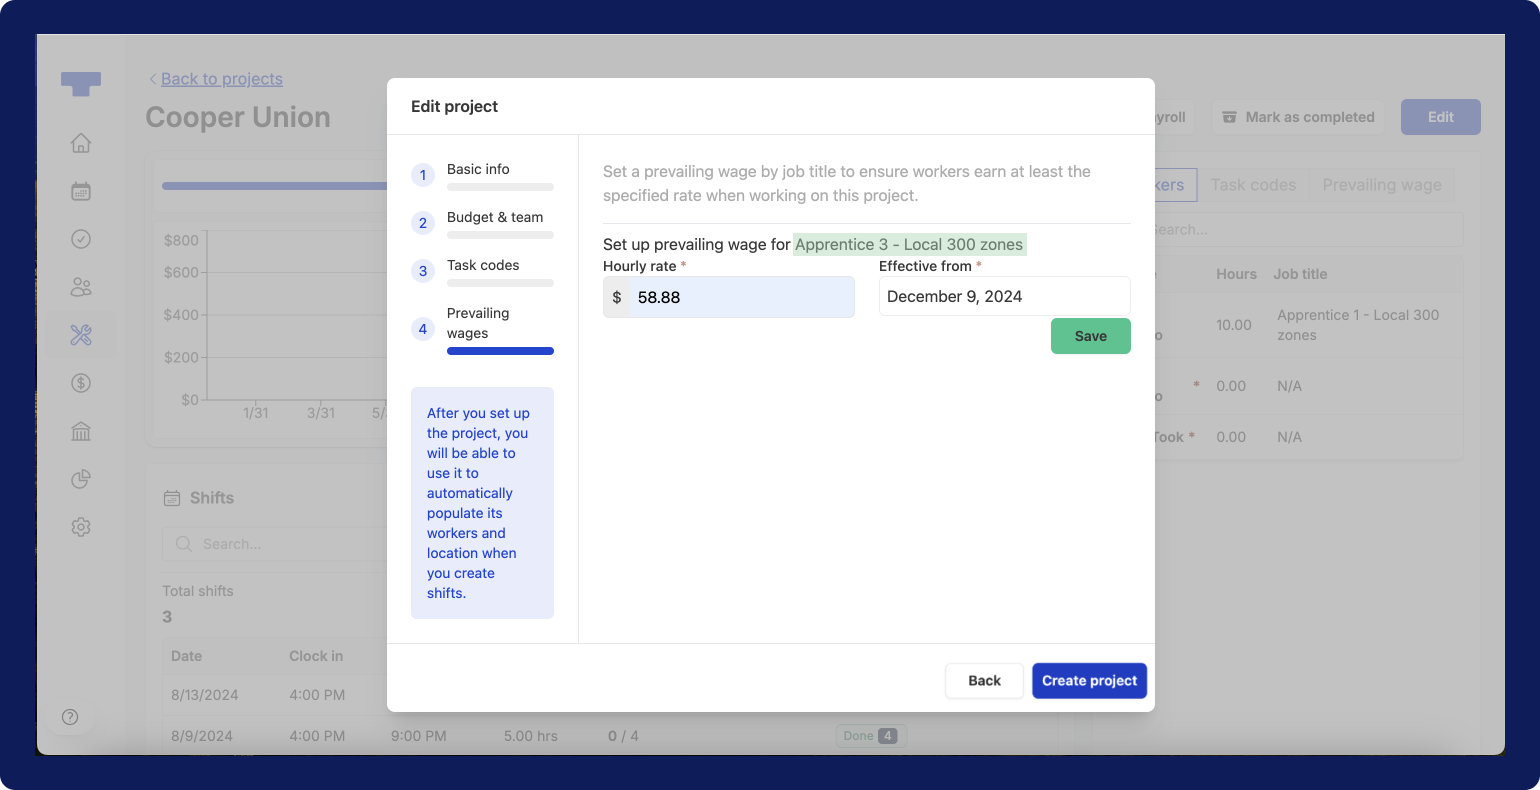
- Afterwards, you’ll be asked to specify the “hourly rate” amount and the “effective date” that prevailing wage should be applied for the project. Once you’re done click the green
Savebutton.
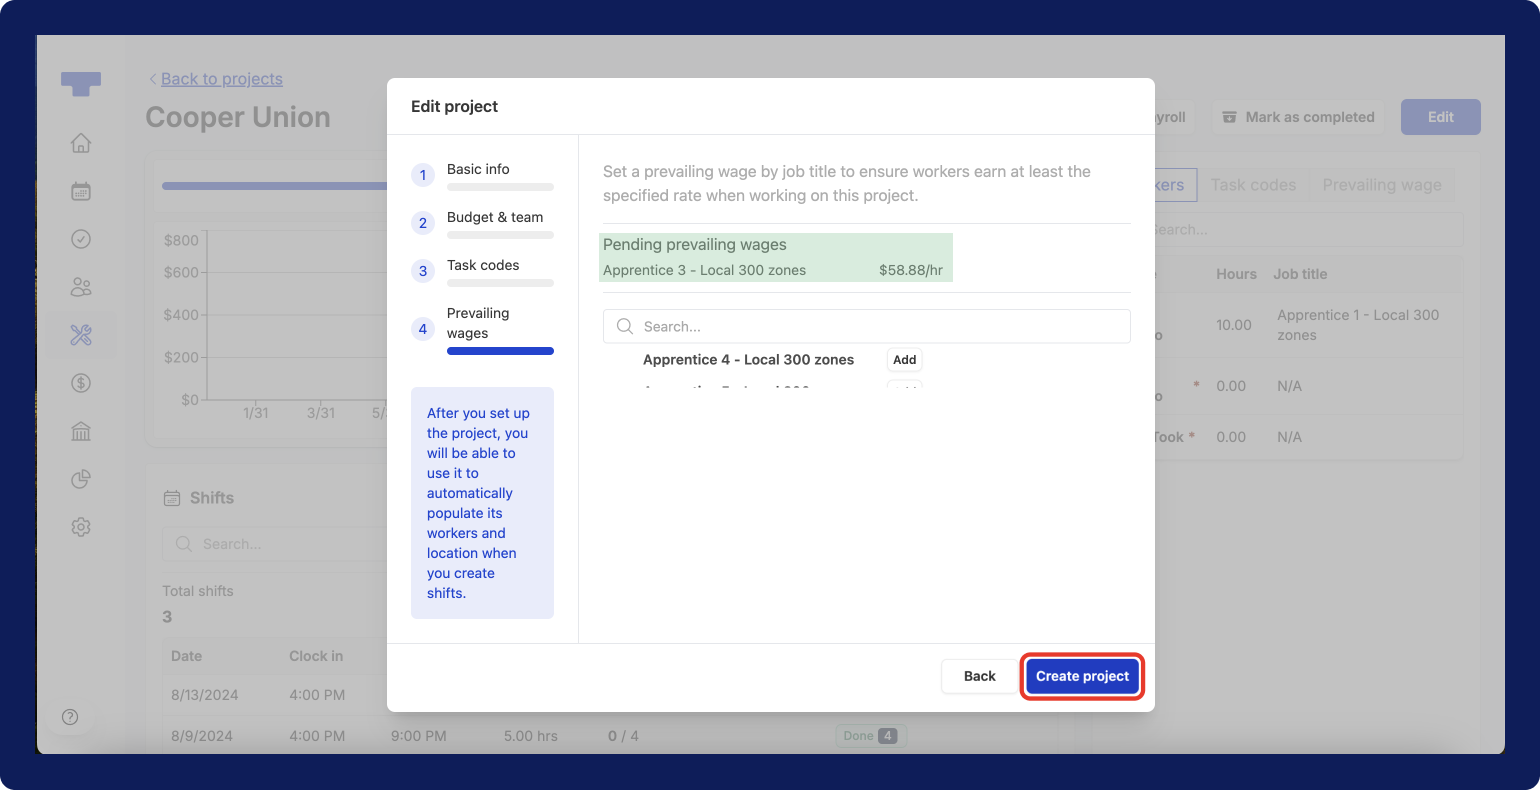
- Afterwards, you’ll see the “Pending prevailing wages” list with the selected job titles and their relevant prevailing wage. If you would like to add another job title, repeat steps 7 and 8.
- Once you’re done, click the
Create projectbutton.
All set! You have created a project that can now be used when you create shifts.
Edit a project
- To edit a project, select the project from the “Project list”. Then, click the
Editbutton on the top right corner. - The “Edit project” modal will open up, and you can go ahead and edit the project details.