Getting started: foreman view
Tags: Foremen Process Workers
Overview
Foreman Mode is available to all workers who have been given Foreman privileges. As a Foreman on Trayd, you are able to:
- Create, edit, and end a shift
- Clock in and clock out workers
- Mark a worker absent
- Review past shifts
Navigating to and from the foreman view
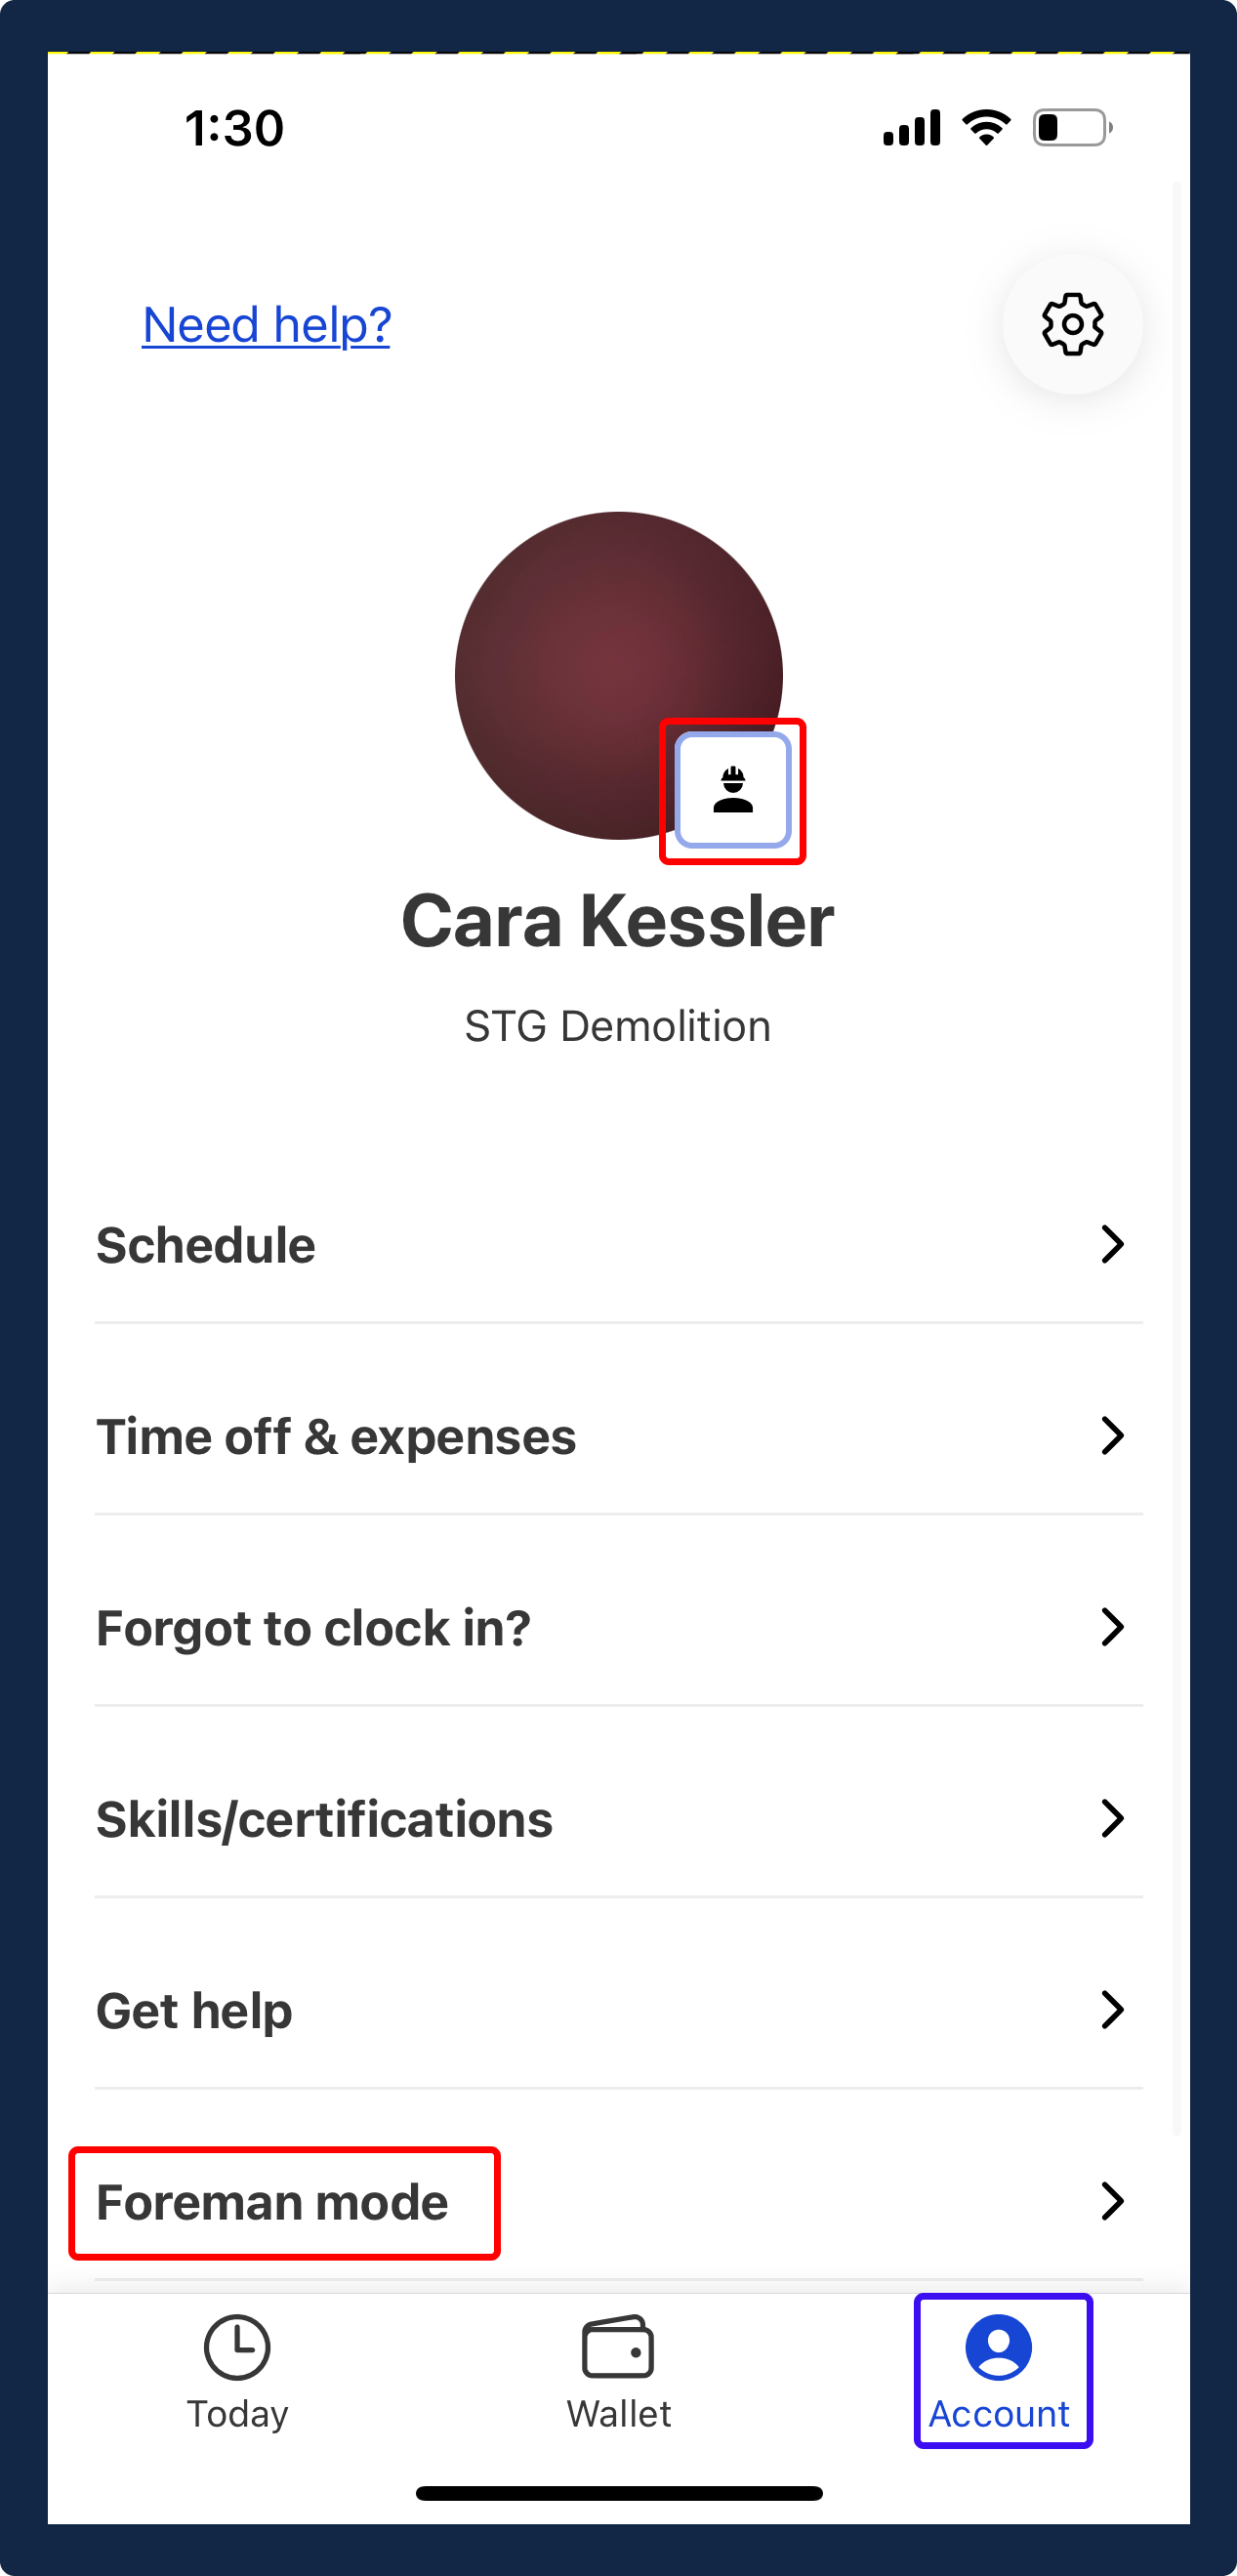
There are 2 easy ways you can navigate to Foreman mode from the main Trayd app:
- Click on the Account option that is on the right of the bottom navigation bar.
2.a. On the Account screen, click the Foreman Mode option.
2.b. Alternatively, on the Account screen, click the Foreman icon on the bottom of your profile picture to navigate to Foreman mode.
Home tab
On the Home tab, you will be able to create shifts to clock in/out workers and submit information at the end of the shift.
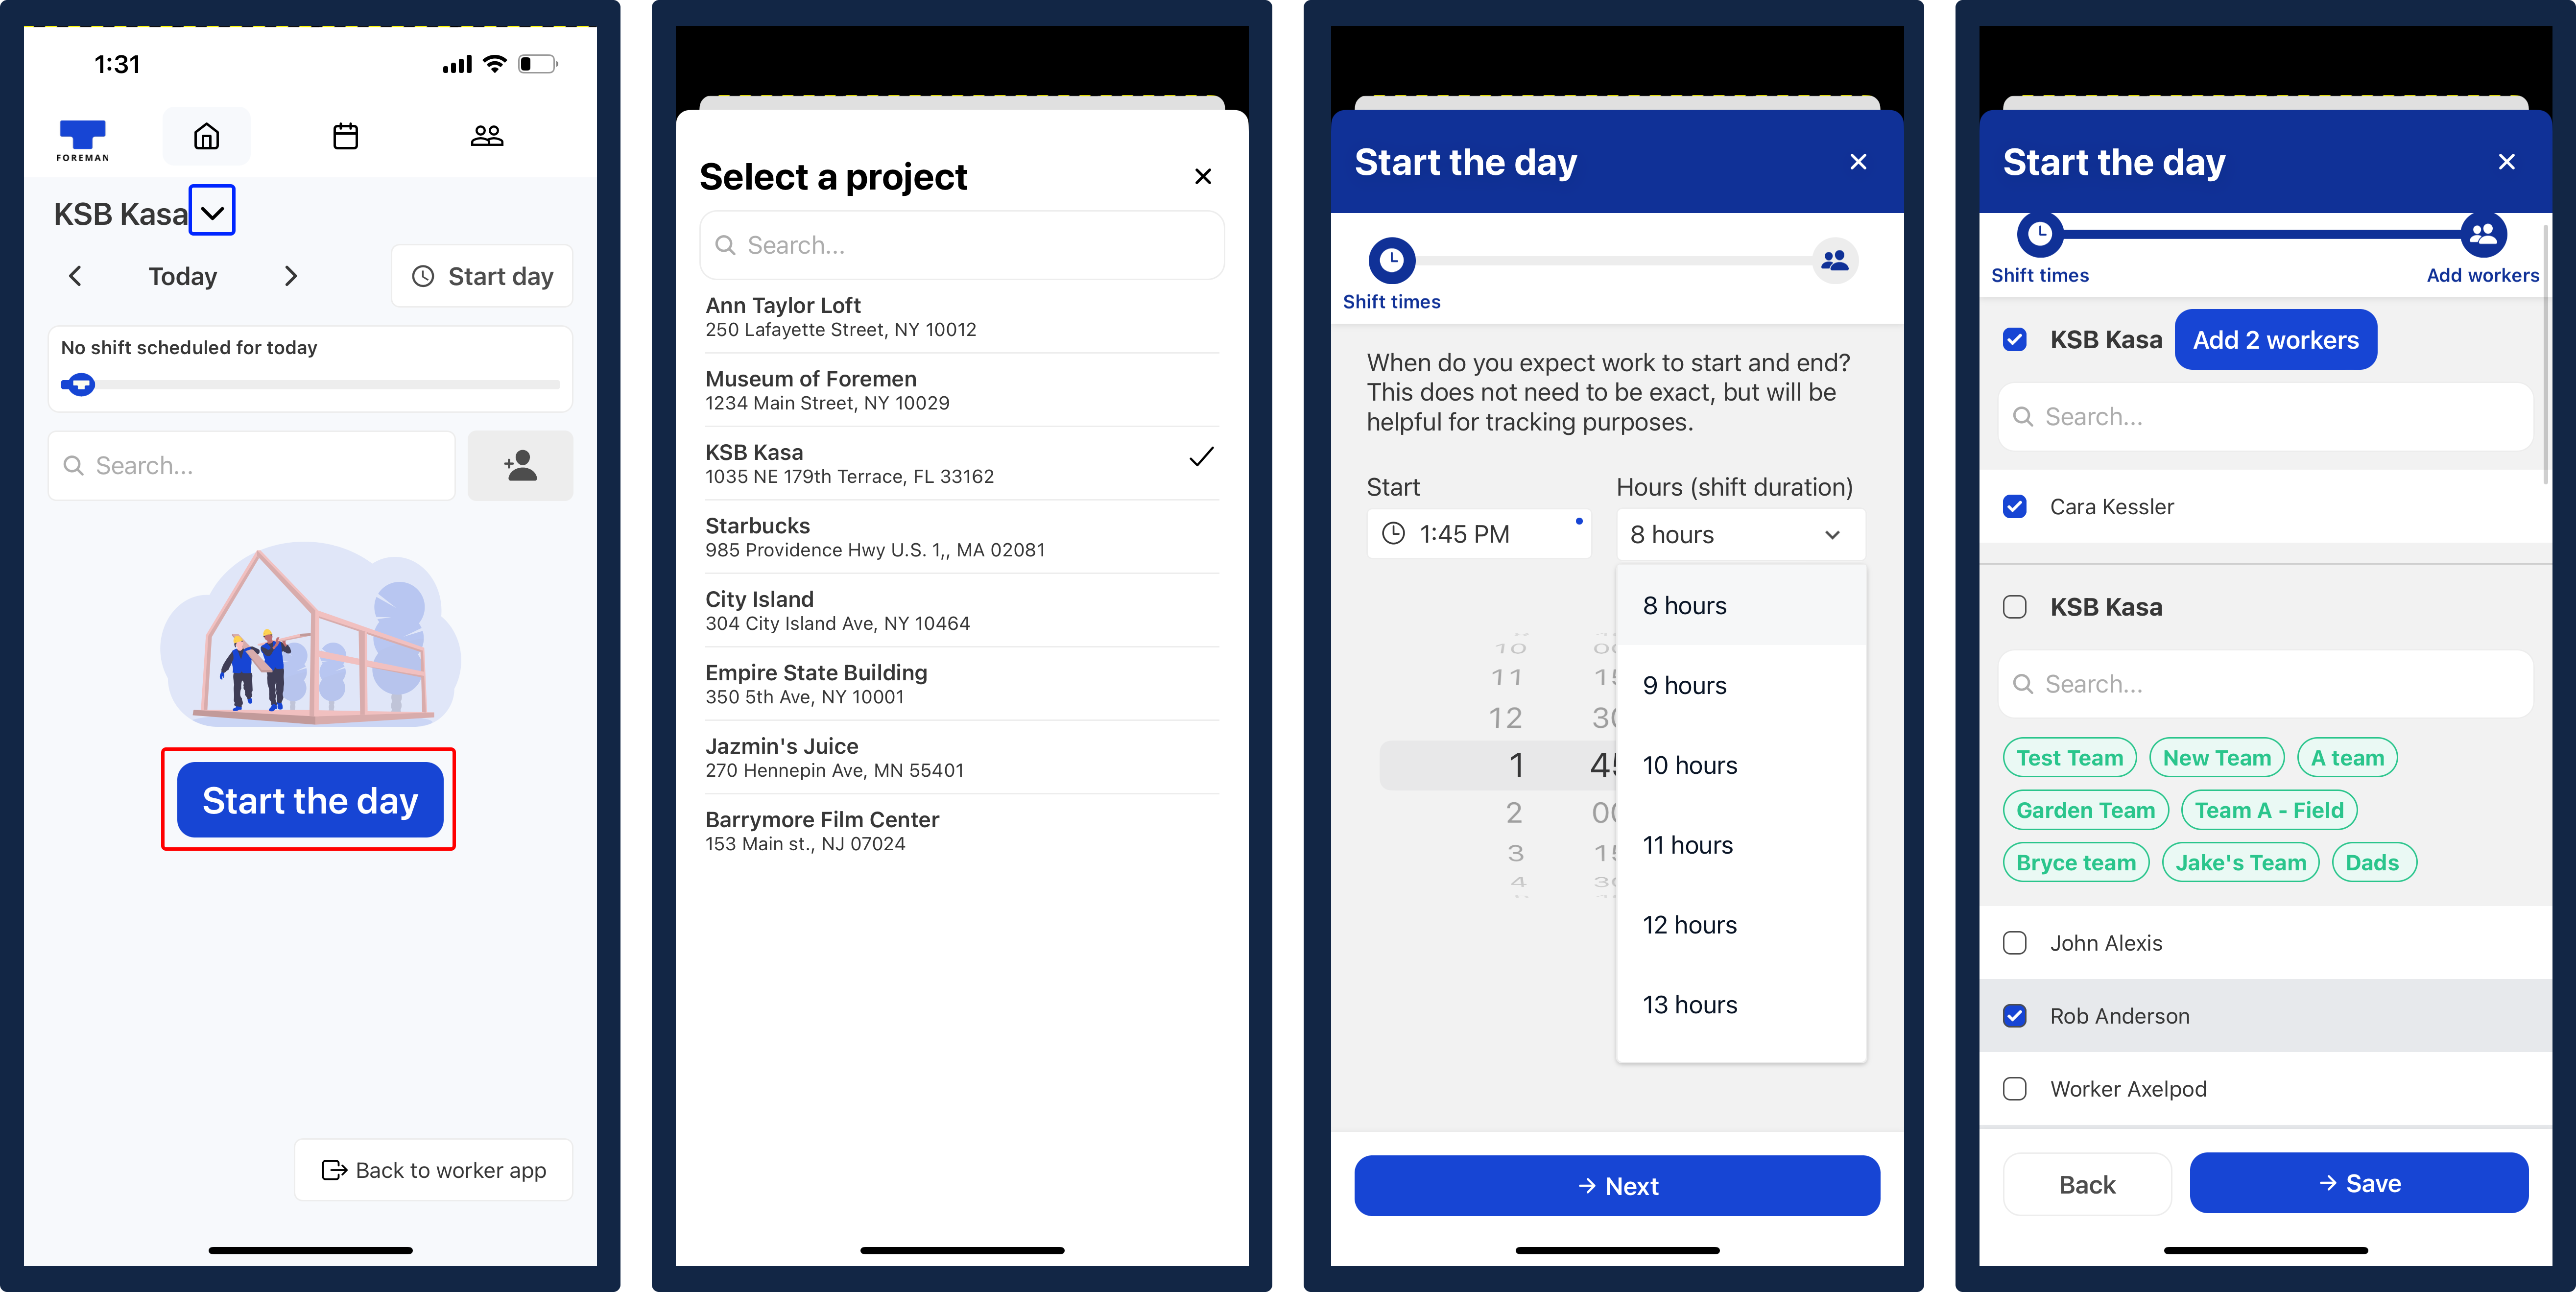
Create a shift
- Make sure you're on the right project. If not, click the project name drop-down to see the list of projects and select the correct one.
- Click the
Start the daybutton. - In the Start the day flow, select the start time and expected duration or end time of the shift. Then, click the blue
Nextbutton. - In the next screen, add all the workers for the shift. When you're ready click the blue
Savebutton.
Clock in/out workers
- To clock in workers, click the blue
→)button next to the worker's name.
- To clock out a worker, click the green
(→button next to the worker's name.

Additional actions
For each worker, you will see a menu ... button on the far right that displays all the actions you can take for that particular worker. The options displayed for each worker will differ depending on their particular status:
- Call: Select the
Calloption to directly call the worker’s cell phone. - Edit shift: Select the
Editoption if you would like to edit a worker’s hours for that particular shift. - Mark absent: If a shift has started and a worker has not yet clocked-in themselves or by you, then you can select the
Mark absentoption.

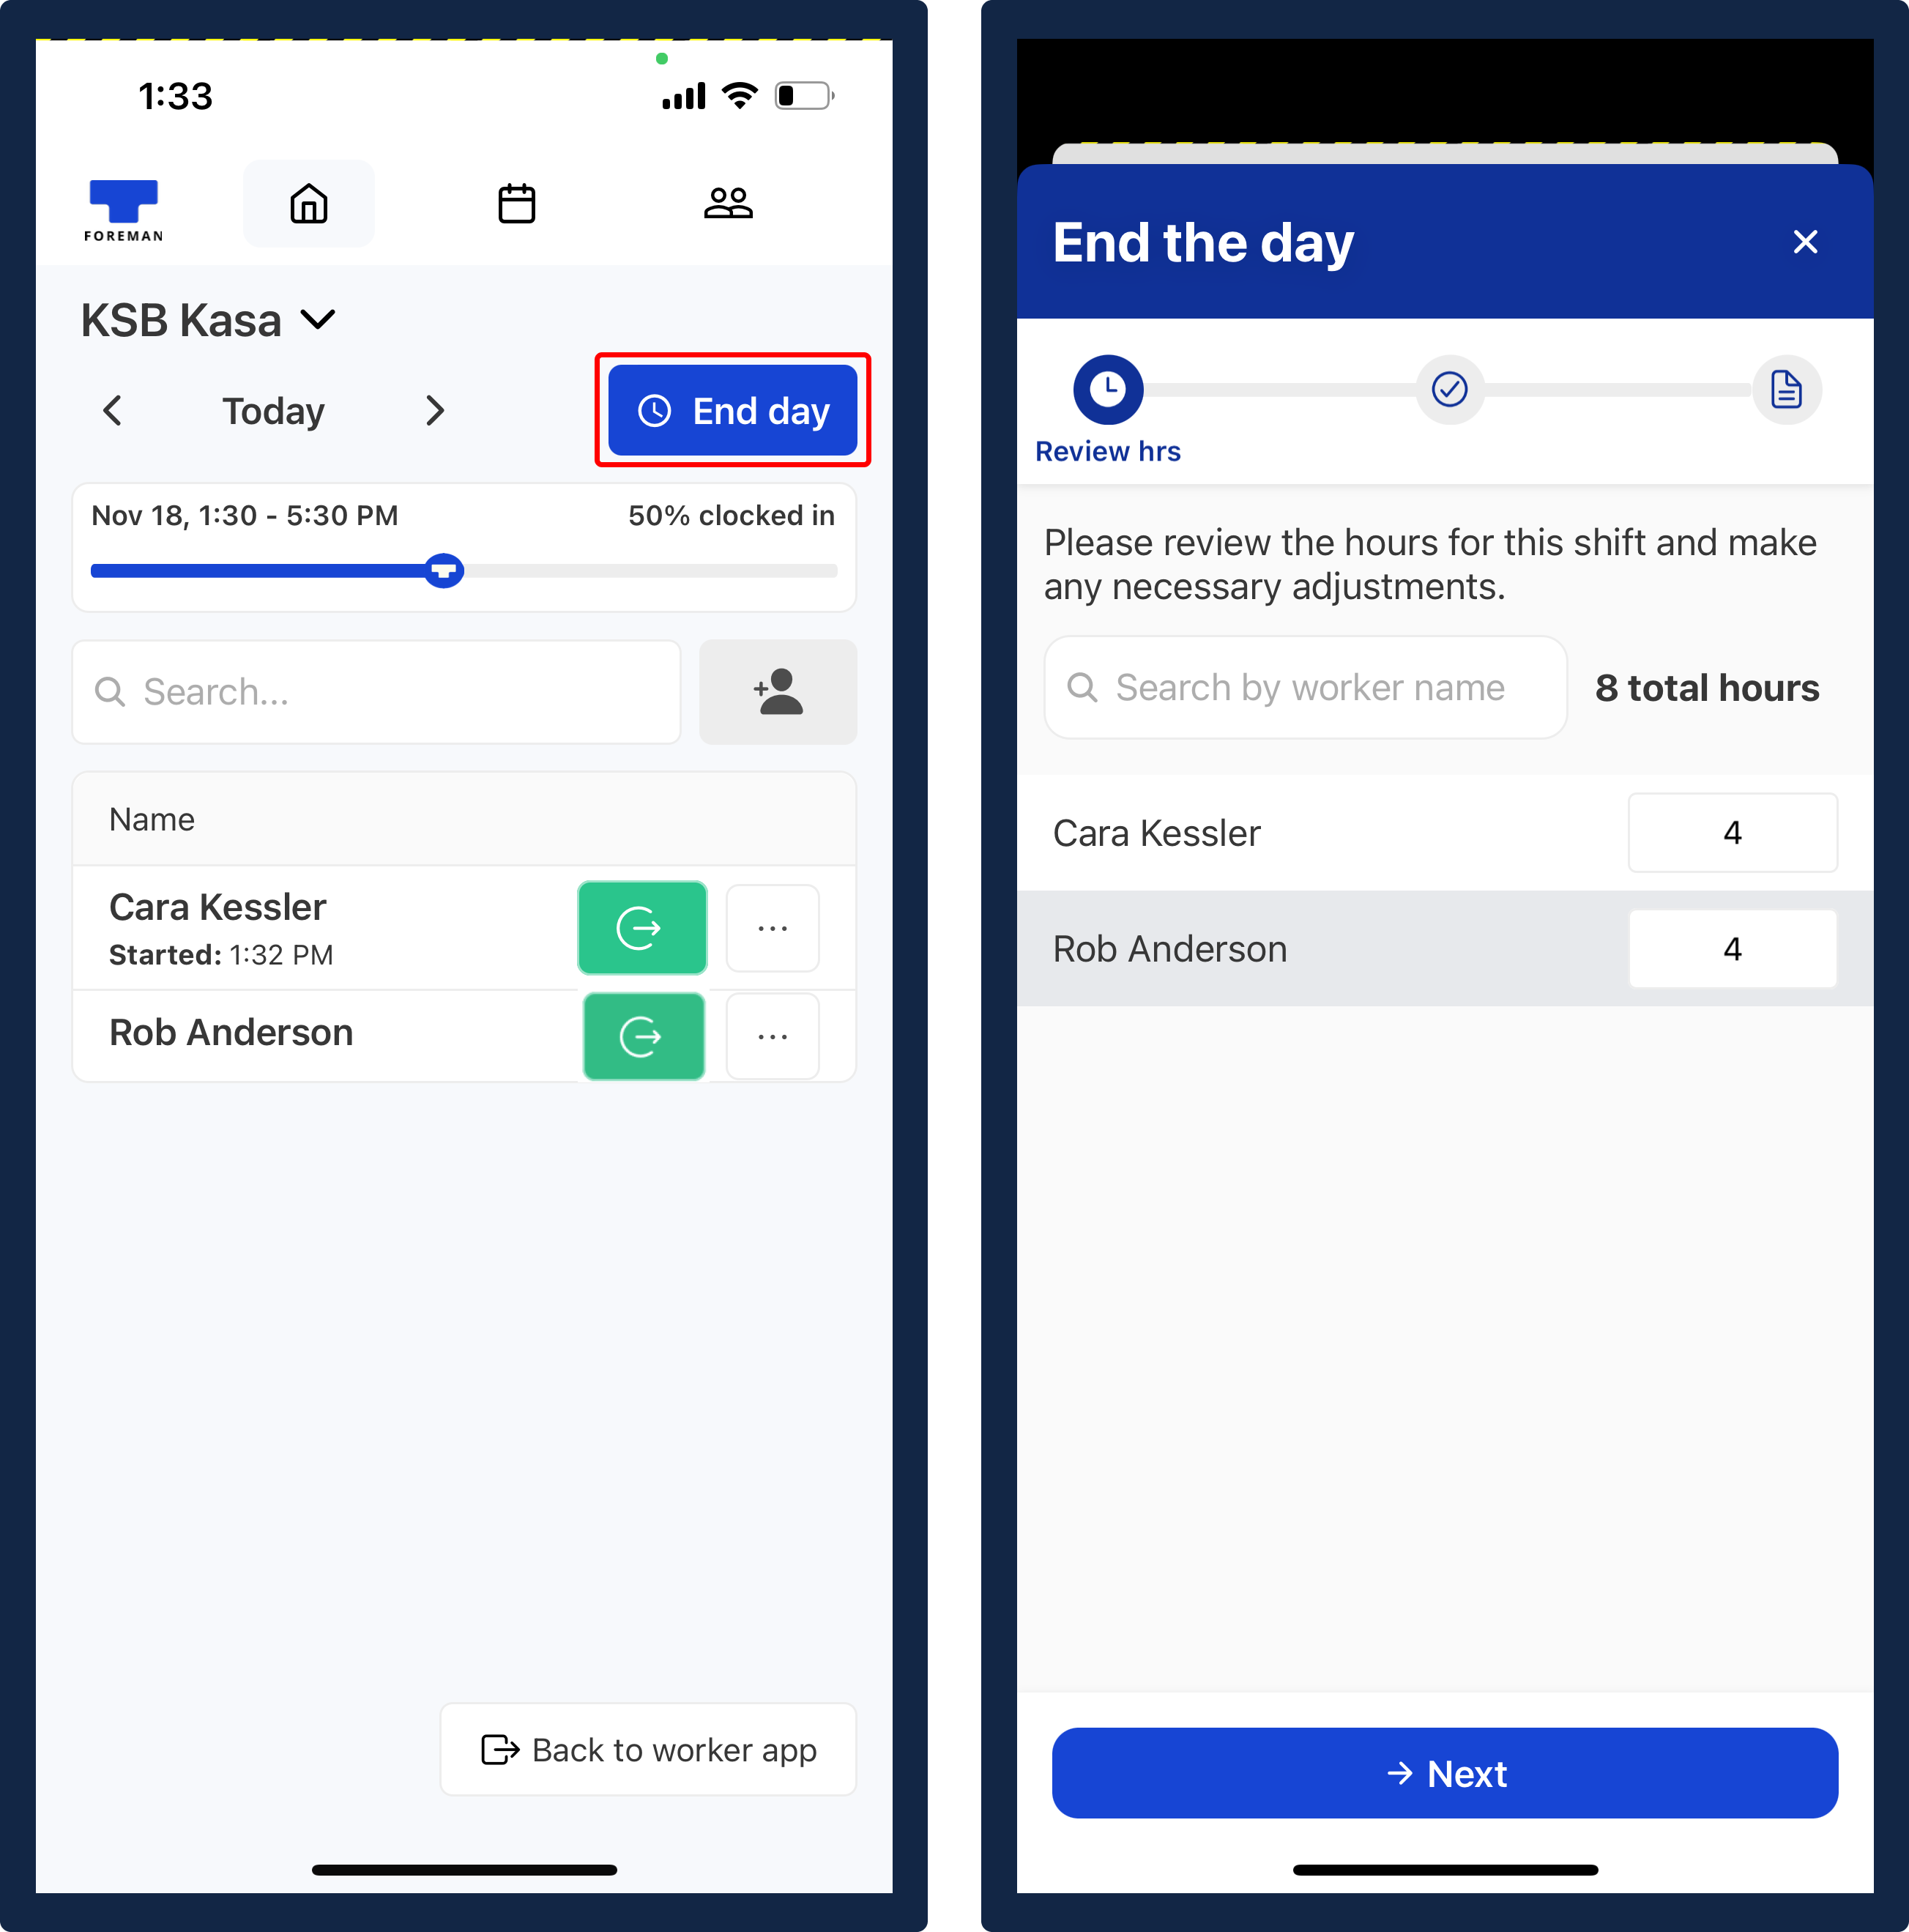
End shift
- After you have clocked out all workers, you're ready to end the shift. Click the blue
End daybutton. - In the End the day flow, you can review all workers' hours and update their hours to reflect accurate duration.
- When you're done, click the blue
Nextbutton.
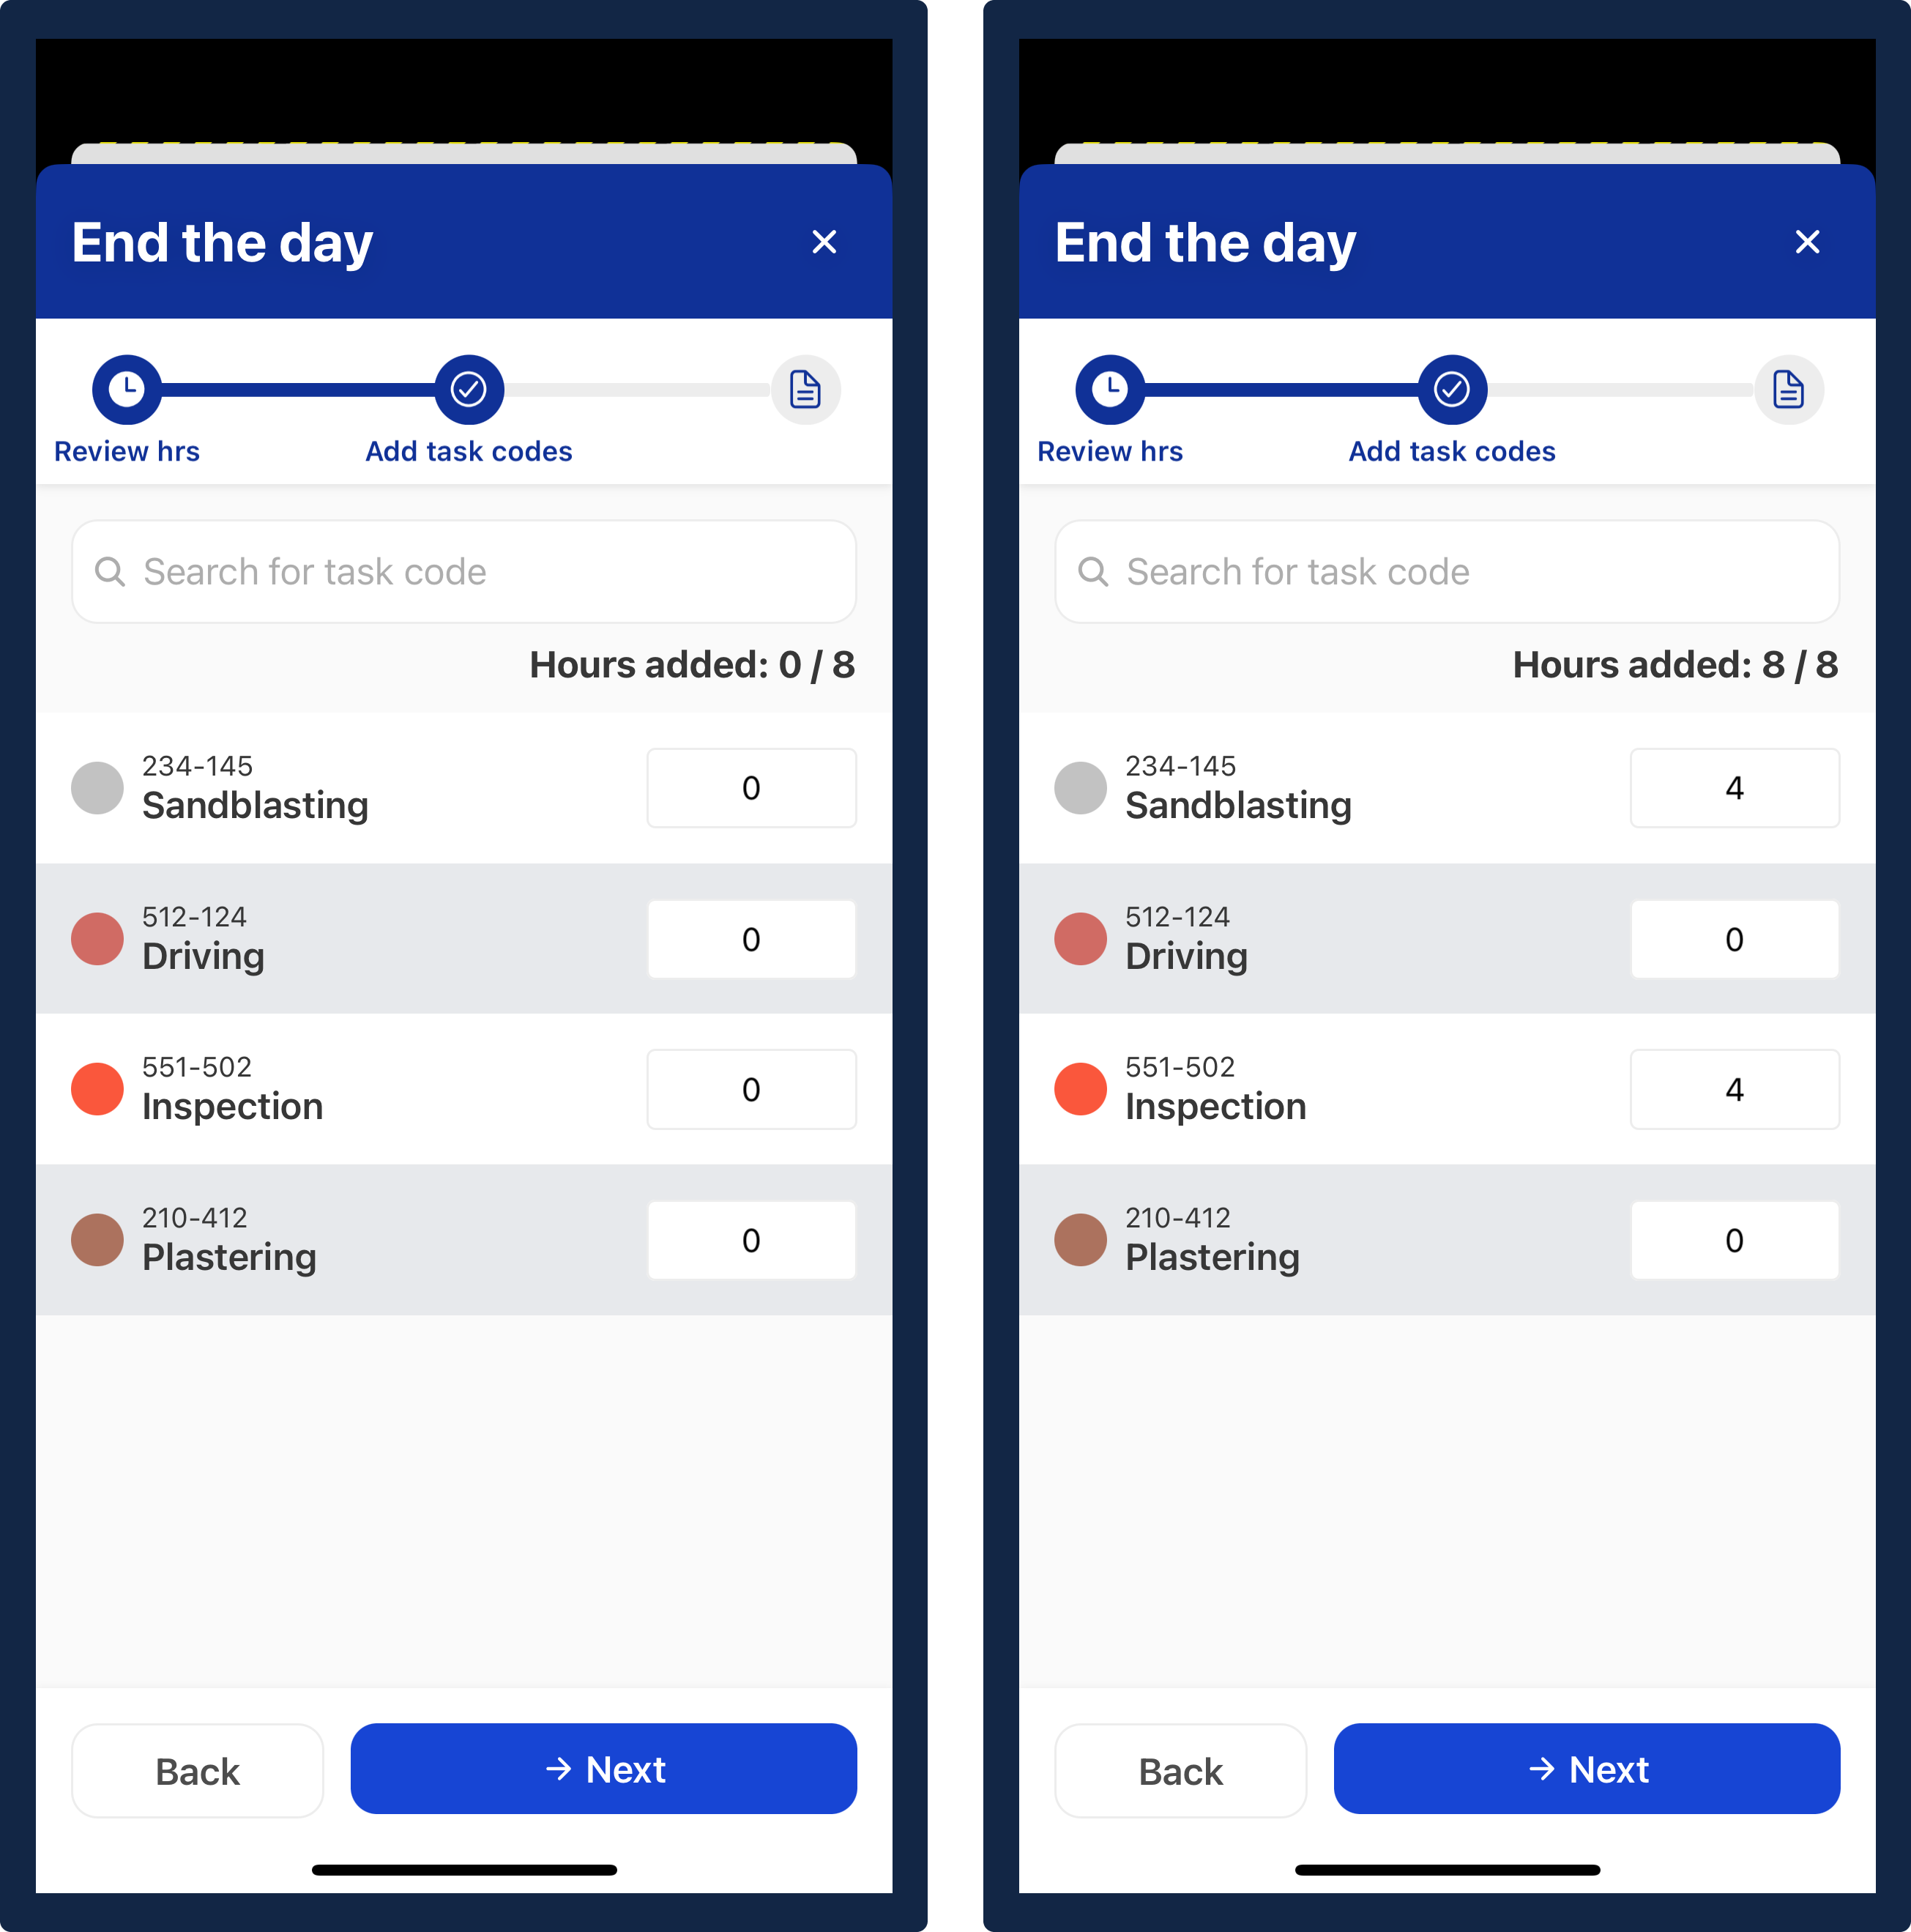
- In the next step, you will be asked to add task codes for the shift. Here, you can allocate hours to each specific task listed below.
- When you're done, click the blue
Nextbutton.
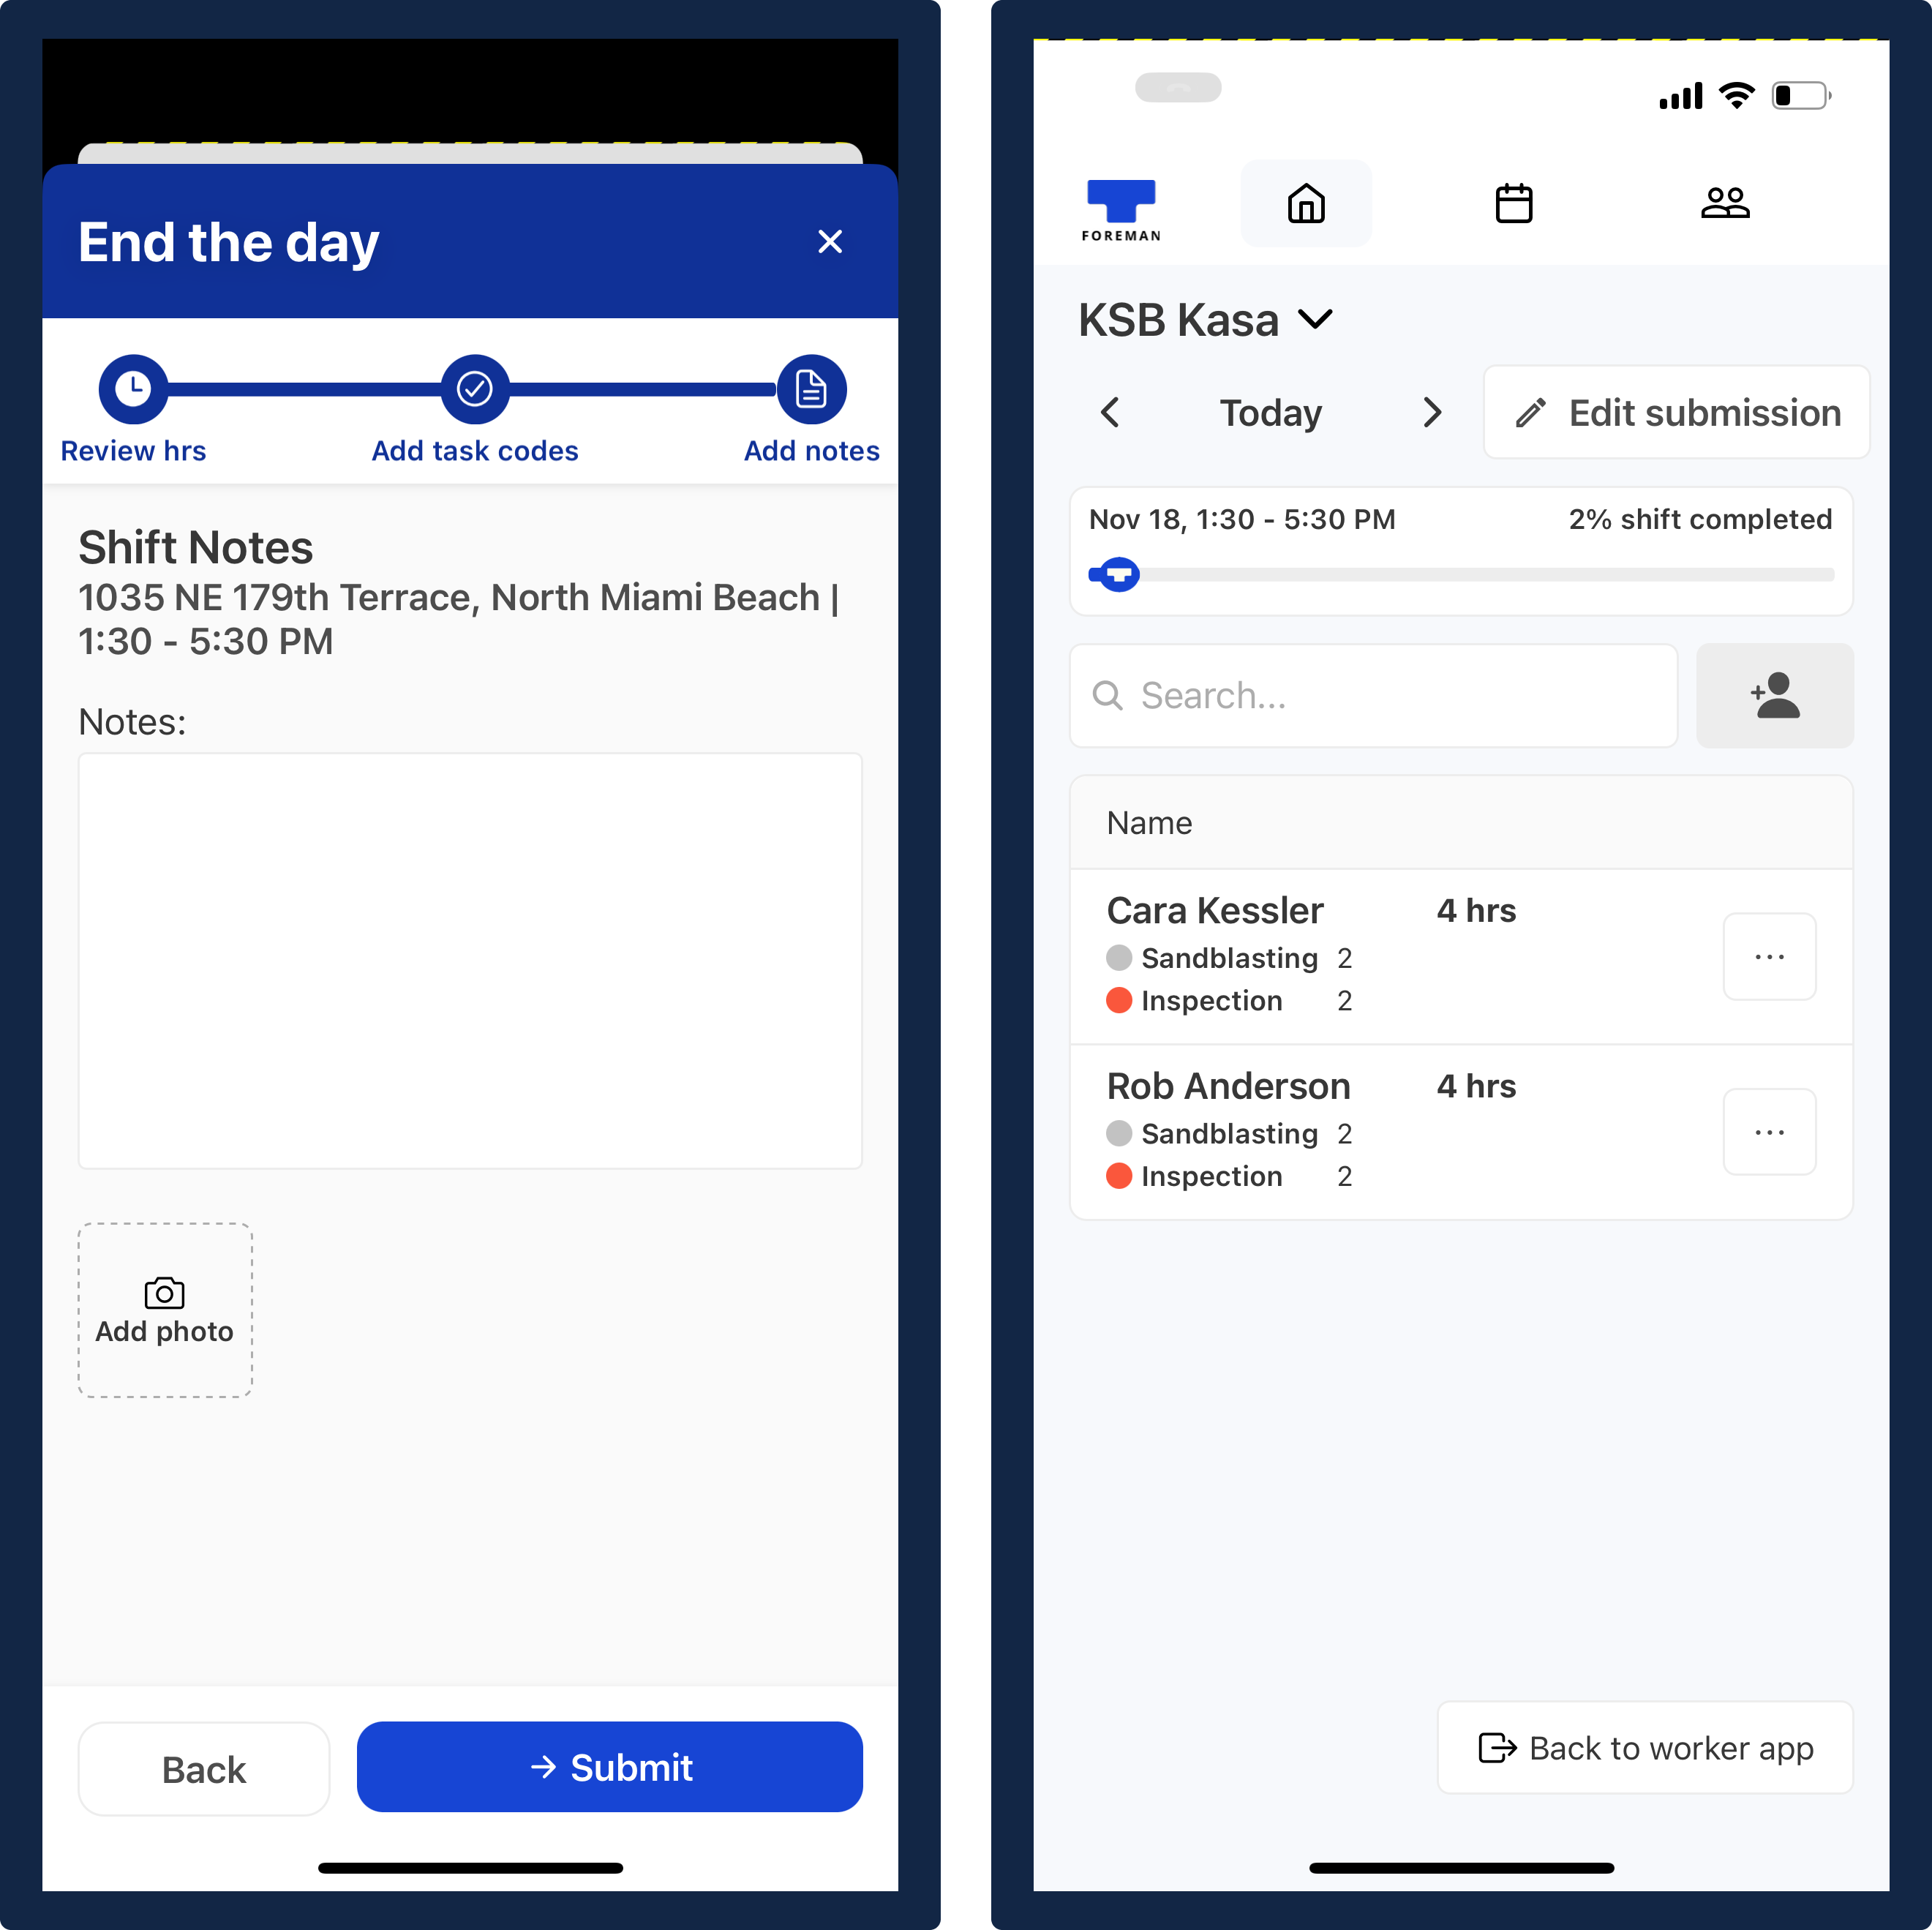
- In the last step, you can leave a note and add a picture. This step is optional.
- When you're ready, click the blue
Submitbutton.
Schedule tab
On the top navigation bar, click on the “Schedule” tab to see a list of all past shifts by week and by project. By default, the current week’s past shifts will be displayed first. For the week view, you can see each date that had a shift. For each individual day, you will see a list of all the relevant workers and their statuses for that shift.
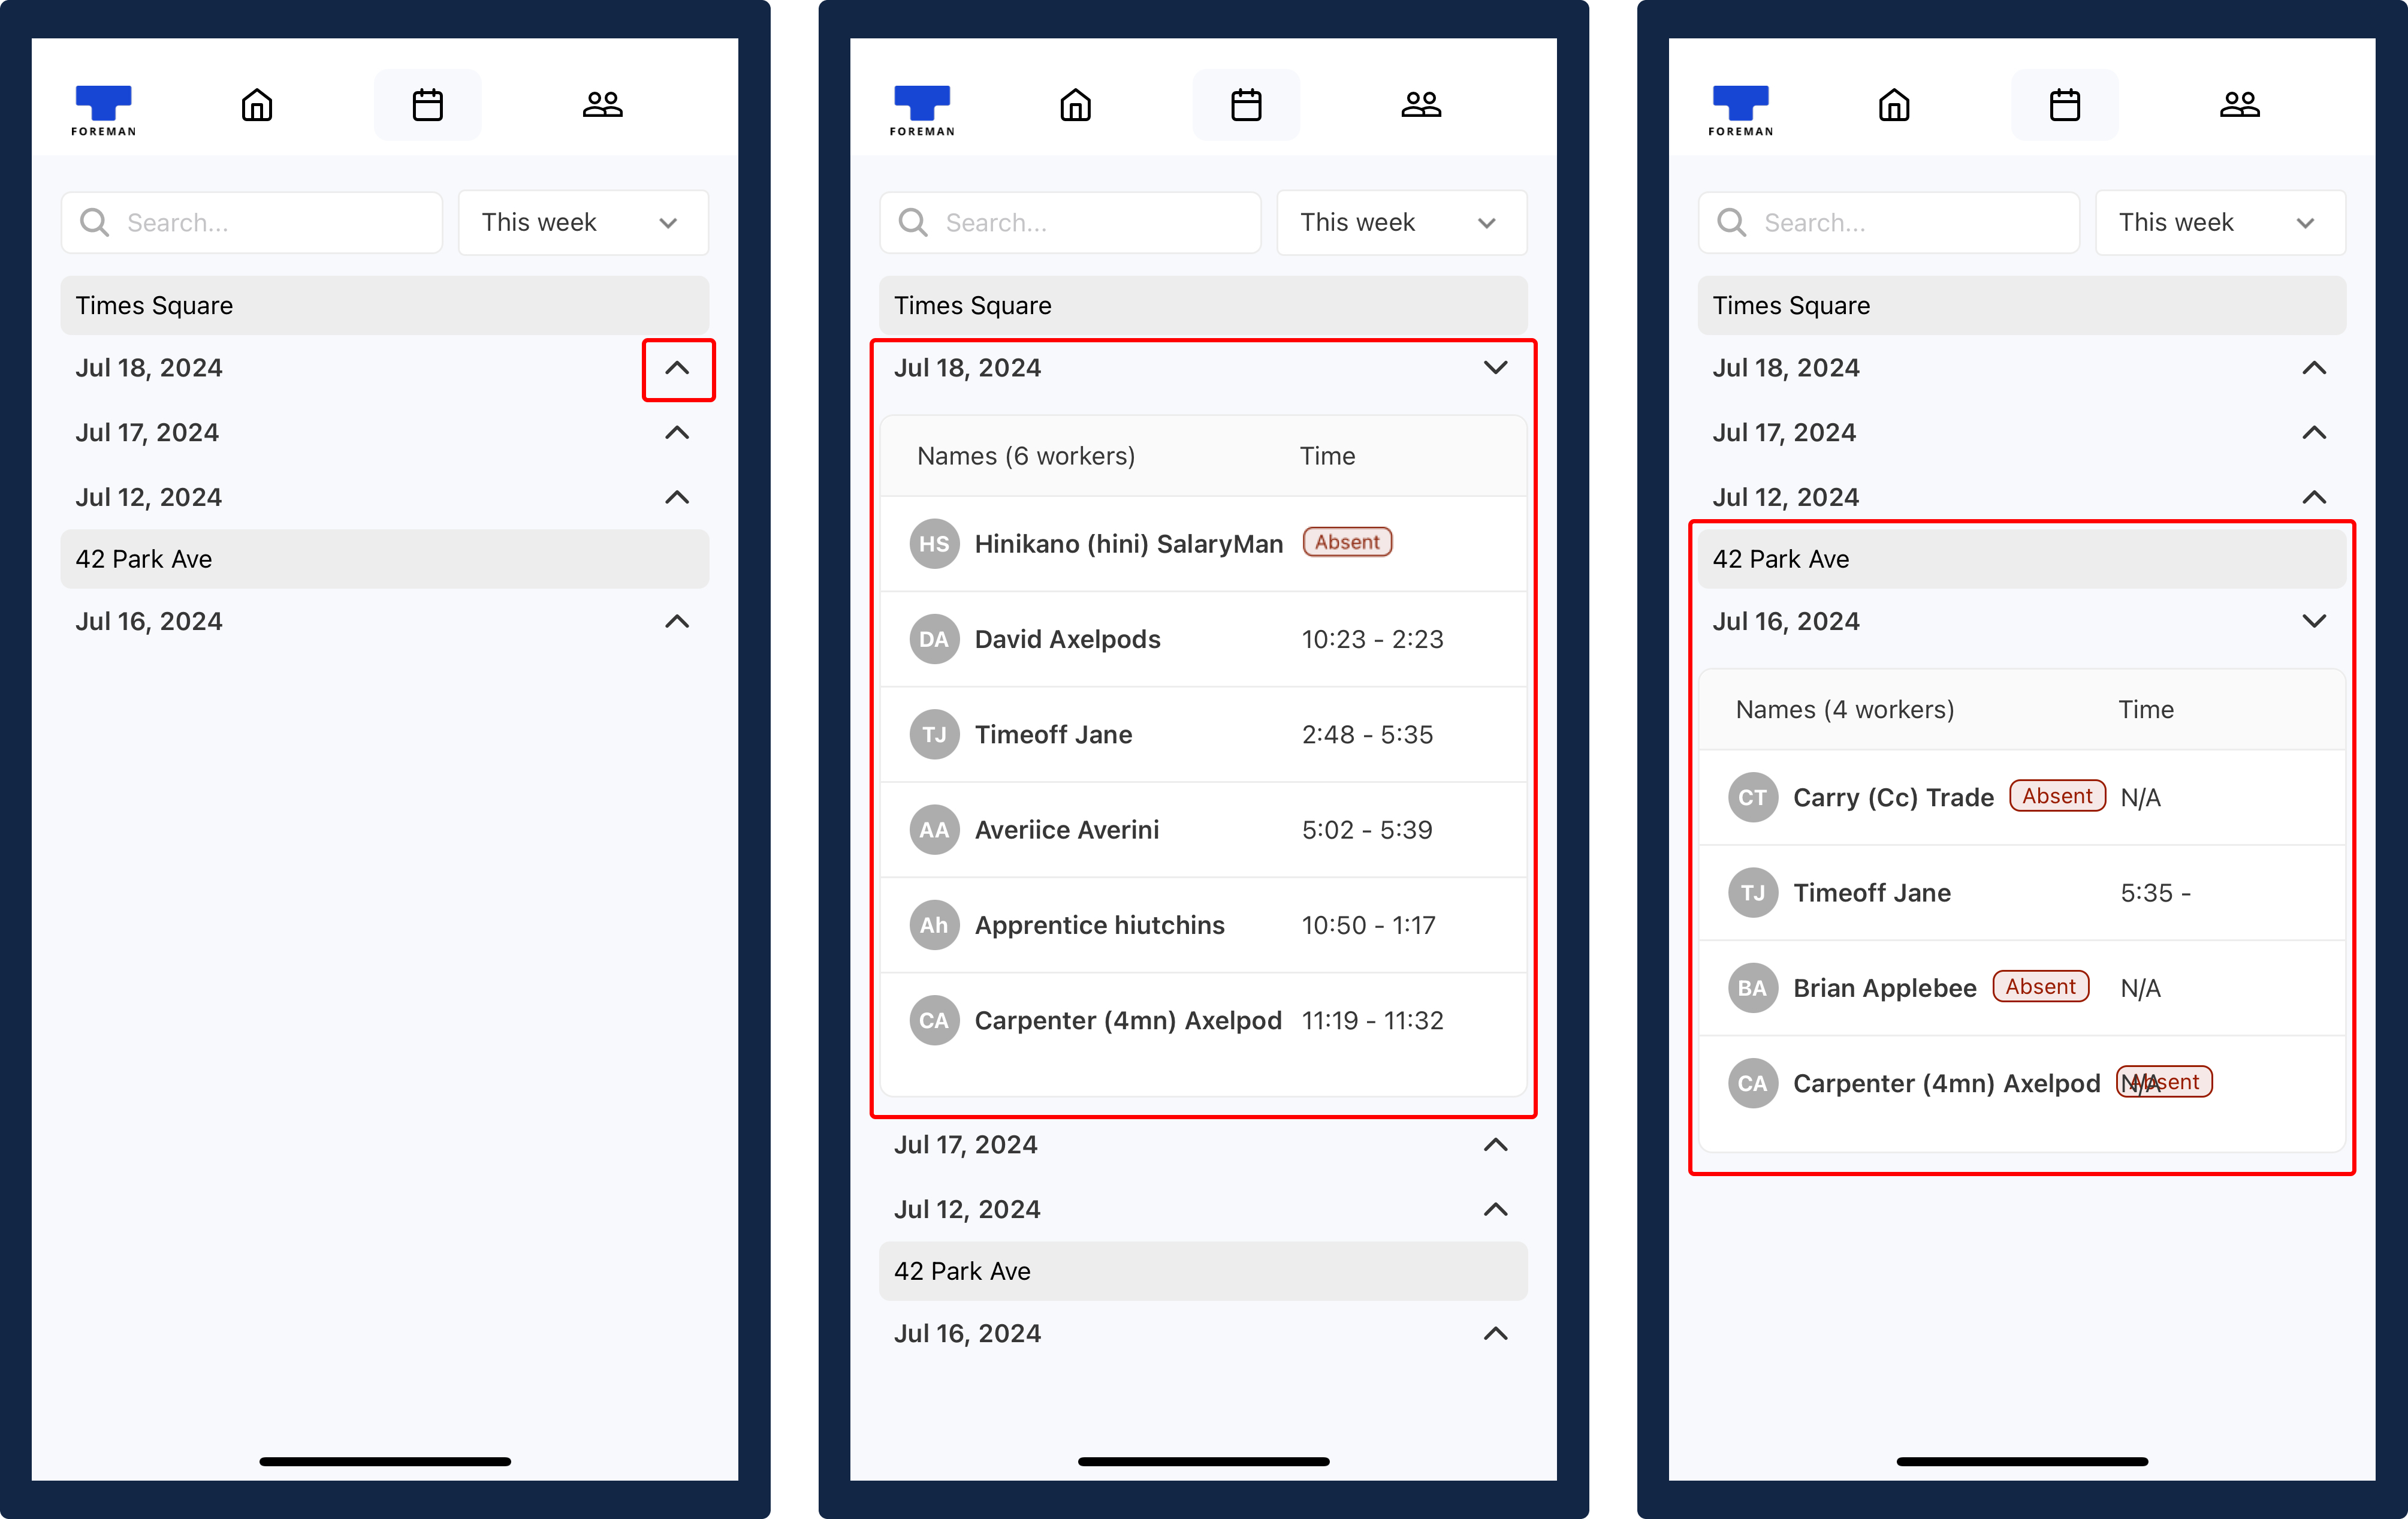
See previous weeks
If you would like to see a previous week’s shifts, you can click on the dropdown on the right side of the screen that says “This week” to view the list of previous weeks and select the week of your choice.

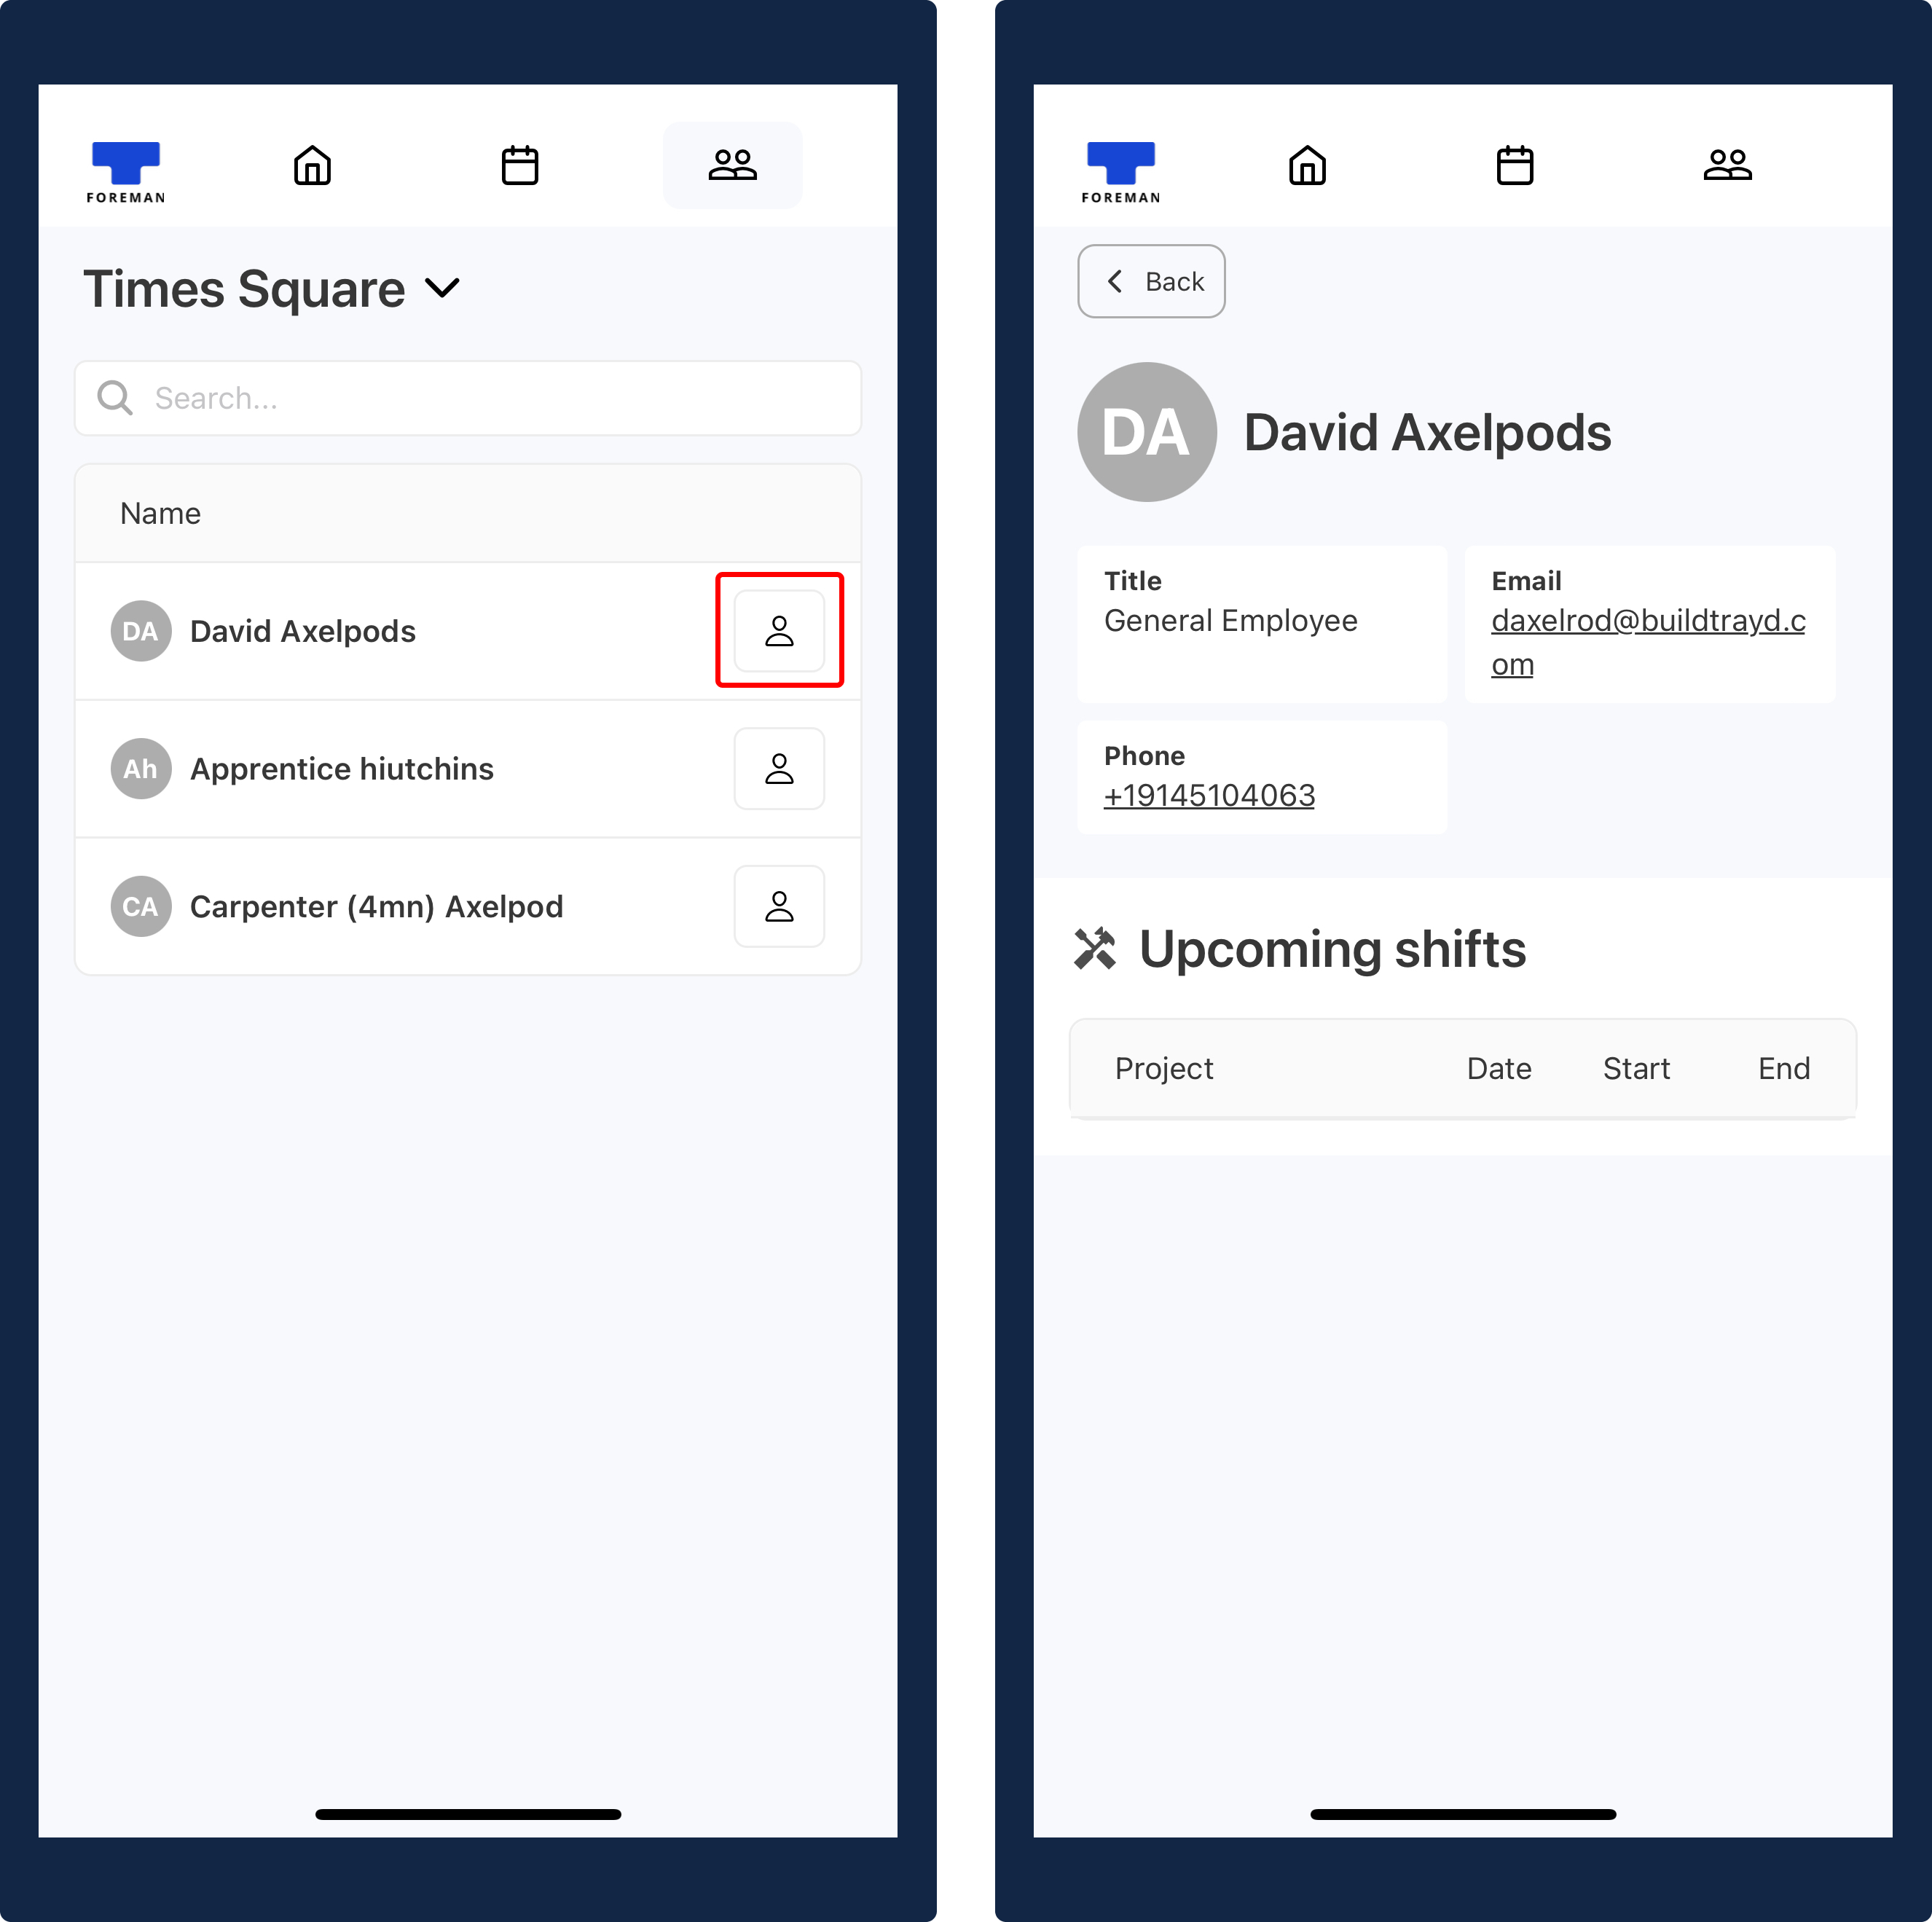
People tab
On the top navigation bar, click on the “People” tab to see more details on each individual. Click on the View Profile button on the far right of the person’s name to view their full profile. Here, you can see a number of details including:
- Worker’s job title
- Worker’s contact information (email and phone number)
- Worker’s upcoming shifts